
How to Cook at home!
A Healthy Lifestyle!
Check Out
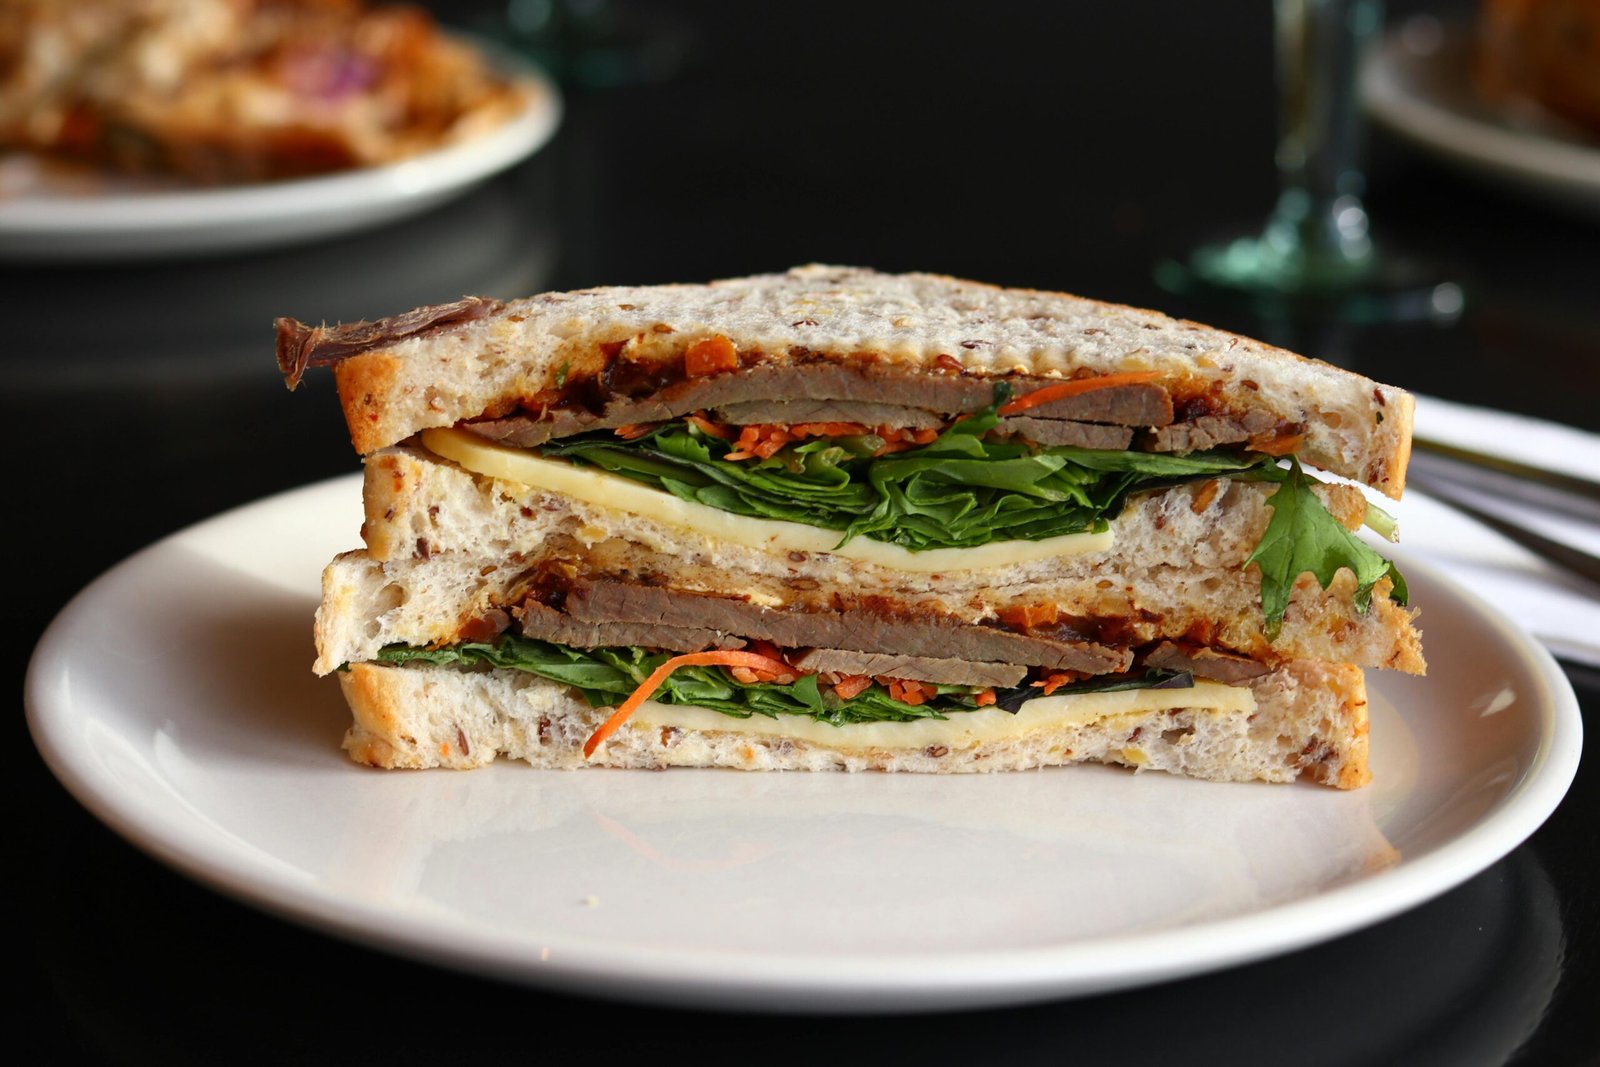
Chicken Sandwich
Are you looking for a recipe for a delicious chicken sandwich? Here’s a simple one to get you started: # Classic Chicken Sandwich Recipe # Ingredients: - 1 boneless, skinless chicken breast - Salt and pepper - 1 teaspoon paprika (optional) - 1 tablespoon olive oil - 1 sandwich bun (like a brioche or whole grain) - Lettuce, tomato, and pickles for topping - Mayonnaise or your favorite sauce # Instructions: 1. **Prepare the Chicken**: Season the chicken breast with salt, pepper, and paprika. 2. **Cook the Chicken**: Heat olive oil in a skillet over medium heat. Add the chicken and cook for about 6-7 minutes per side, or until fully cooked (internal temperature should reach 165°F). 3. **Toast the Bun**: While the chicken is cooking, you can toast the sandwich bun in a separate pan or in the toaster. 4. **Assemble the Sandwich**: Spread mayonnaise on the bottom half of the bun, then add the cooked chicken, lettuce, tomato, and pickles. Top with the other half of the bun. 5. **Enjoy**: Serve immediately with your favorite sides! Feel free to customize it with cheese, avocado, or your favorite condiments!
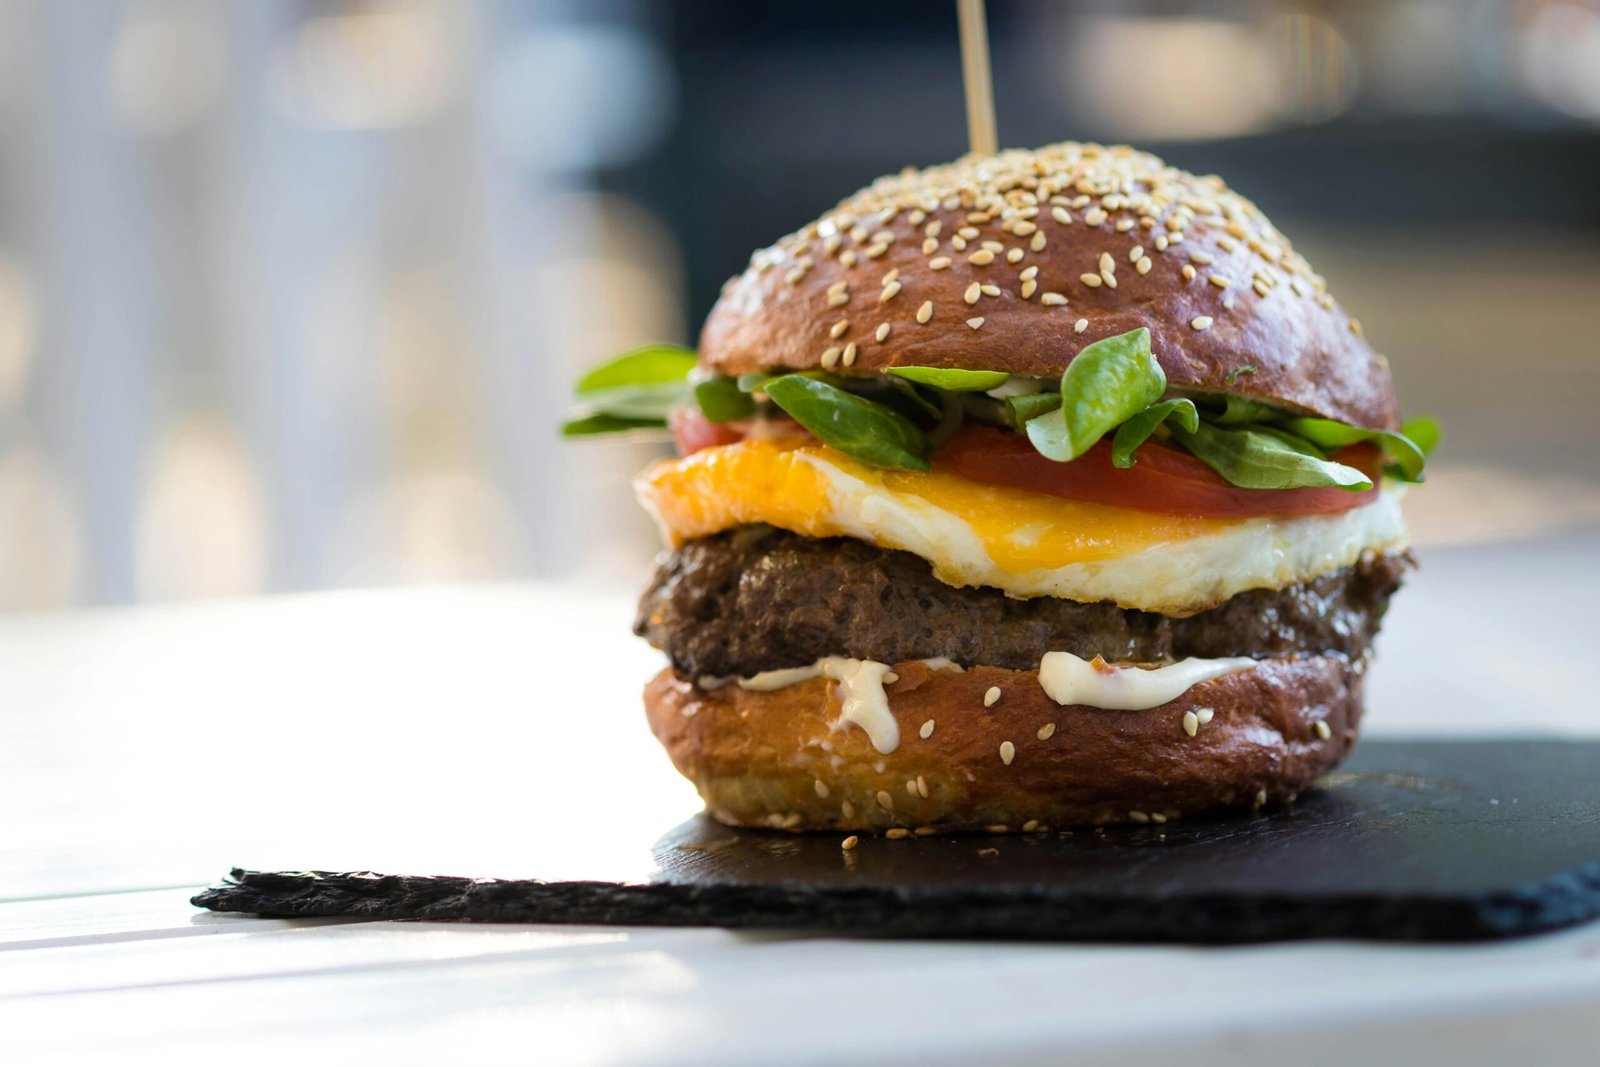
Classic Cheese Burger
Classic cheeseburger recipe: # Ingredients: - 1 lb ground beef (80/20 for juiciness) - Salt and pepper - 4 slices of cheese (American or cheddar) - 4 burger buns - Lettuce, tomato, onion, and pickles for toppings - Ketchup and mustard for condiments # Instructions: 1. **Shape the Patties**: Divide the ground beef into four equal portions and shape them into patties. Make a slight indentation in the center to prevent them from puffing up while cooking. Season both sides with salt and pepper. 2. **Cook the Patties**: Heat a grill or skillet over medium-high heat. Cook the patties for about 3-4 minutes on one side. Flip them, add cheese on top, and cook for an additional 3-4 minutes, or until they reach your desired doneness. 3. **Toast the Buns**: During the last minute of cooking, toast the burger buns on the grill or in a separate pan until golden. 4. **Assemble the Burger**: Place the cooked patty on the bottom bun, add your desired toppings (lettuce, tomato, onion, pickles), and spread ketchup and mustard to taste. Top with the other half of the bun. 5. **Serve**: Enjoy your cheeseburger with fries or your favorite side! Feel free to get creative with toppings and sauces!
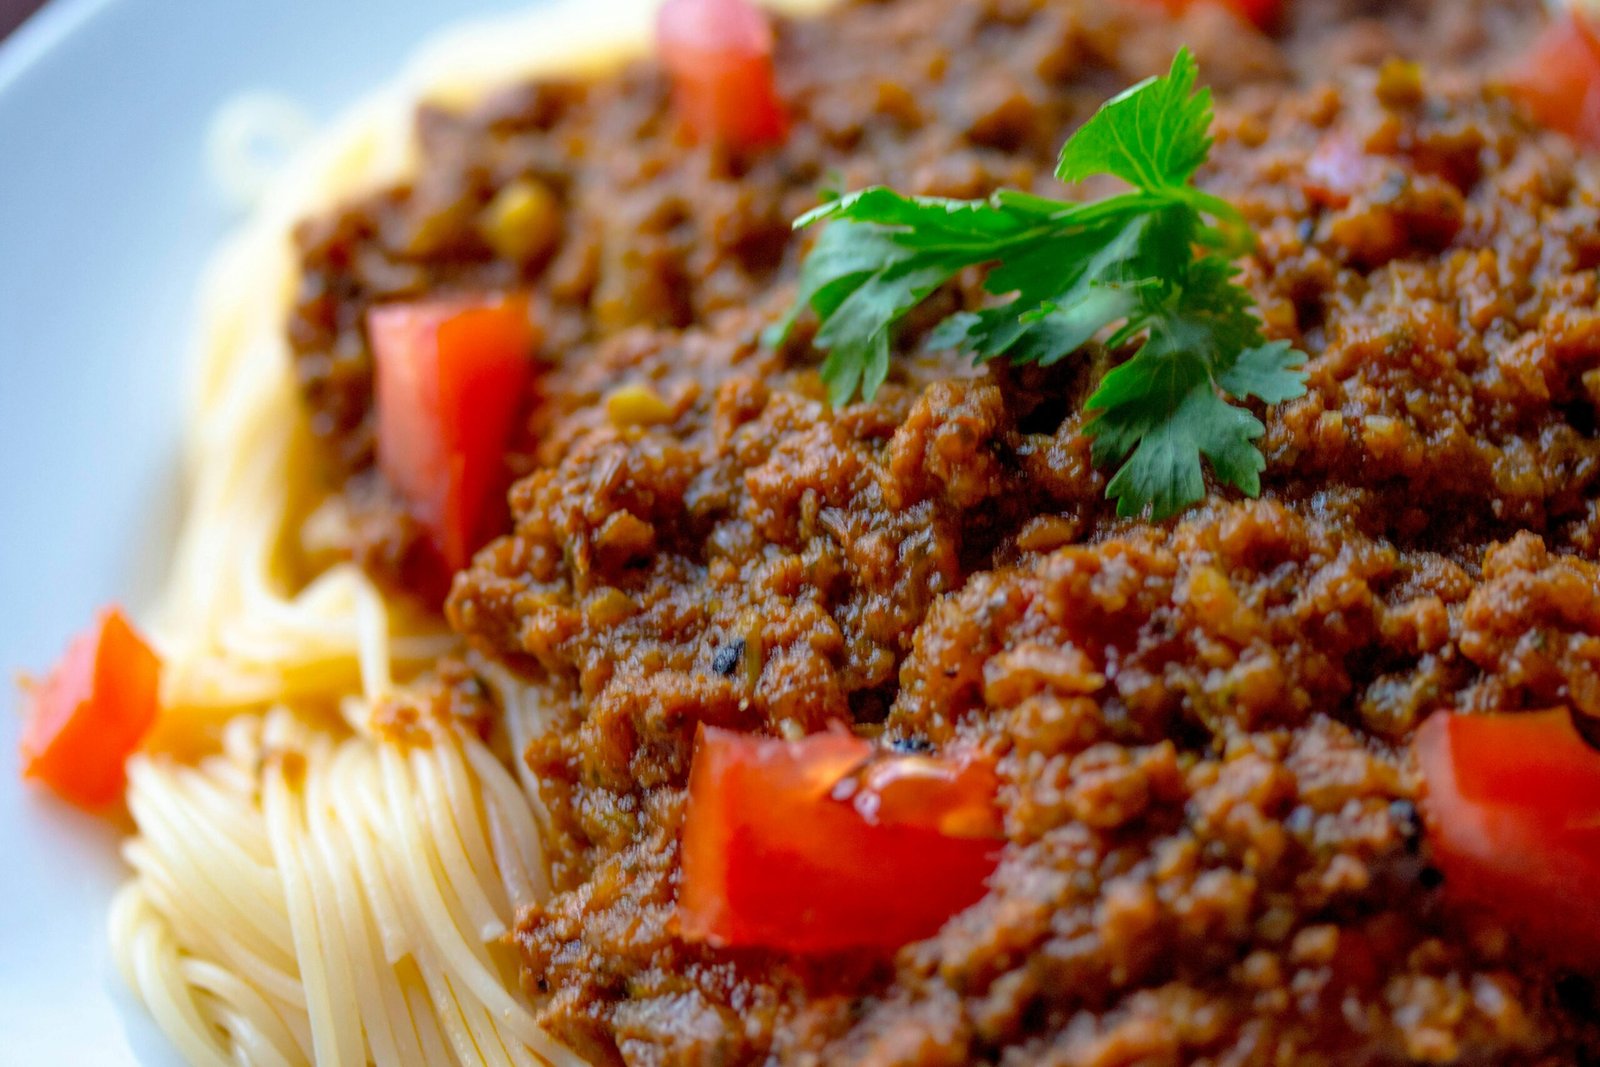
Spaghetti
Here’s a classic spaghetti recipe with a simple marinara sauce that’s sure to please! # Classic Spaghetti with Marinara Sauce # Ingredients: **For the Spaghetti:** - 12 oz spaghetti - Salt (for the pasta water) **For the Marinara Sauce:** - 2 tablespoons olive oil - 1 medium onion, chopped - 3 cloves garlic, minced - 1 can (28 oz) crushed tomatoes - 1 teaspoon dried oregano - 1 teaspoon dried basil - Salt and pepper to taste - A pinch of red pepper flakes (optional, for heat) - Fresh basil for garnish (optional) - Grated Parmesan cheese for serving (optional) #### Instructions: 1. **Cook the Spaghetti:** - Bring a large pot of salted water to a boil. Add the spaghetti and cook according to package instructions until al dente. Drain and set aside, reserving a little pasta water. 2. **Make the Marinara Sauce:** - In a large skillet, heat olive oil over medium heat. Add the chopped onion and sauté until translucent, about 5 minutes. - Add the minced garlic and cook for an additional 1-2 minutes, until fragrant. - Stir in the crushed tomatoes, oregano, basil, salt, pepper, and red pepper flakes (if using). Bring to a simmer and let cook for about 15-20 minutes, stirring occasionally. 3. **Combine:** - Once the sauce has thickened, add the cooked spaghetti to the skillet. Toss to combine, adding a splash of reserved pasta water if needed to reach your desired consistency. 4. **Serve:** - Plate the spaghetti and garnish with fresh basil and grated Parmesan cheese, if desired. Enjoy your delicious spaghetti! 🍝

Homemade Pizza
Here's a simple and delicious homemade pizza recipe! ### Homemade Pizza Recipe #### Ingredients: **For the Dough:** - 2 ¼ teaspoons (1 packet) active dry yeast - 1 teaspoon sugar - ¾ cup warm water (about 110°F) - 2 cups all-purpose flour - 1 teaspoon salt - 1 tablespoon olive oil **For the Toppings:** - 1 cup pizza sauce (store-bought or homemade) - 2 cups shredded mozzarella cheese - Your choice of toppings (pepperoni, bell peppers, onions, mushrooms, olives, etc.) - Dried oregano and basil (optional, for seasoning) #### Instructions: 1. **Make the Dough:** - In a small bowl, combine warm water, yeast, and sugar. Let it sit for about 5-10 minutes until it becomes frothy. - In a large bowl, mix flour and salt. Make a well in the center and add the yeast mixture and olive oil. Mix until a dough forms. - Knead the dough on a floured surface for about 5-7 minutes until smooth and elastic. - Place the dough in a greased bowl, cover with a cloth, and let it rise in a warm place for about 1 hour or until doubled in size. 2. **Preheat the Oven:** - Preheat your oven to 475°F (245°C). If you have a pizza stone, place it in the oven to heat up. 3. **Shape the Dough:** - Punch down the risen dough and transfer it to a floured surface. Roll or stretch it out into your desired shape and thickness (about 12 inches for a medium pizza). - Transfer the dough to a baking sheet or a pizza peel if using a stone. 4. **Add Toppings:** - Spread pizza sauce evenly over the dough, leaving a small border for the crust. - Sprinkle shredded mozzarella cheese over the sauce. - Add your choice of toppings and sprinkle with dried oregano and basil if desired. 5. **Bake the Pizza:** - If using a pizza stone, transfer the pizza onto the stone. If using a baking sheet, place it directly in the oven. - Bake for about 12-15 minutes or until the cheese is bubbly and the crust is golden brown. 6. **Serve:** - Remove the pizza from the oven, let it cool for a couple of minutes, then slice and enjoy! Feel free to customize with your favorite toppings! Enjoy your homemade pizza! 🍕.
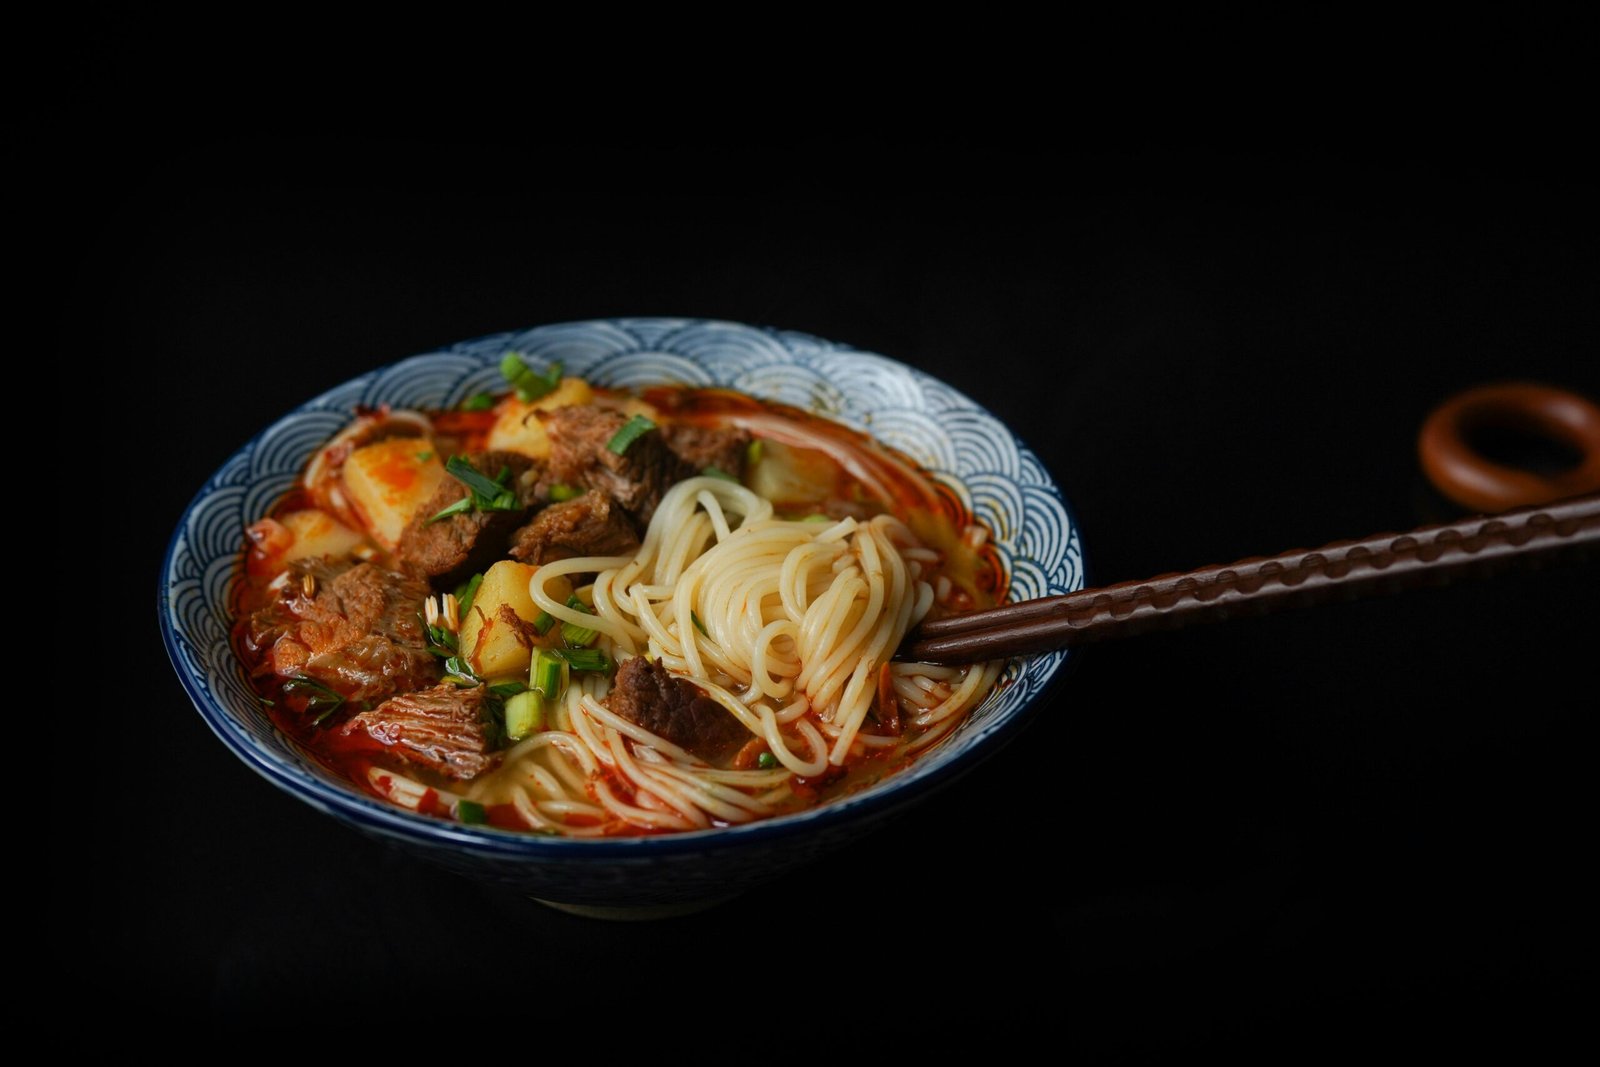
Spicy Chicken Ramen soup
Here’s a flavorful recipe for **Spicy Chicken Ramen Soup** that’s sure to warm you up! # Spicy Chicken Ramen Soup # Ingredients: - **For the Soup:** - 2 tablespoons sesame oil - 1 pound boneless, skinless chicken thighs (or breasts) - Salt and pepper, to taste - 4 cups chicken broth - 2 cups water - 3-4 tablespoons soy sauce (adjust to taste) - 1-2 tablespoons chili paste or Sriracha (adjust to spice preference) - 1 tablespoon grated ginger - 3 cloves garlic, minced - 2 green onions, sliced (plus extra for garnish) - 2-3 cups baby spinach or bok choy - 4 servings of ramen noodles (fresh or dried) - **For Toppings (optional):** - Soft-boiled eggs - Nori (seaweed sheets) - Sliced mushrooms - Corn - Sesame seeds #### Instructions: 1. **Cook the Chicken:** - In a large pot, heat the sesame oil over medium heat. Season the chicken thighs with salt and pepper, then add them to the pot. Cook for about 5-7 minutes on each side until golden brown and cooked through. Remove the chicken and let it rest for a few minutes before shredding it. 2. **Prepare the Broth:** - In the same pot, add the grated ginger, minced garlic, and sliced green onions. Sauté for 1-2 minutes until fragrant. - Pour in the chicken broth and water. Add soy sauce and chili paste (or Sriracha). Bring the mixture to a simmer. 3. **Cook the Noodles:** - While the broth simmers, cook the ramen noodles according to package instructions. Drain and set aside. 4. **Combine:** - Add the shredded chicken and baby spinach (or bok choy) to the broth. Let it cook for another 2-3 minutes until the greens are wilted. 5. **Assemble the Soup:** - In bowls, divide the cooked ramen noodles. Ladle the spicy chicken broth and toppings over the noodles. 6. **Top and Serve:** - Add optional toppings like soft-boiled eggs, nori, mushrooms, corn, and sesame seeds. Garnish with extra green onions. Enjoy your delicious Spicy Chicken Ramen Soup! 🍜
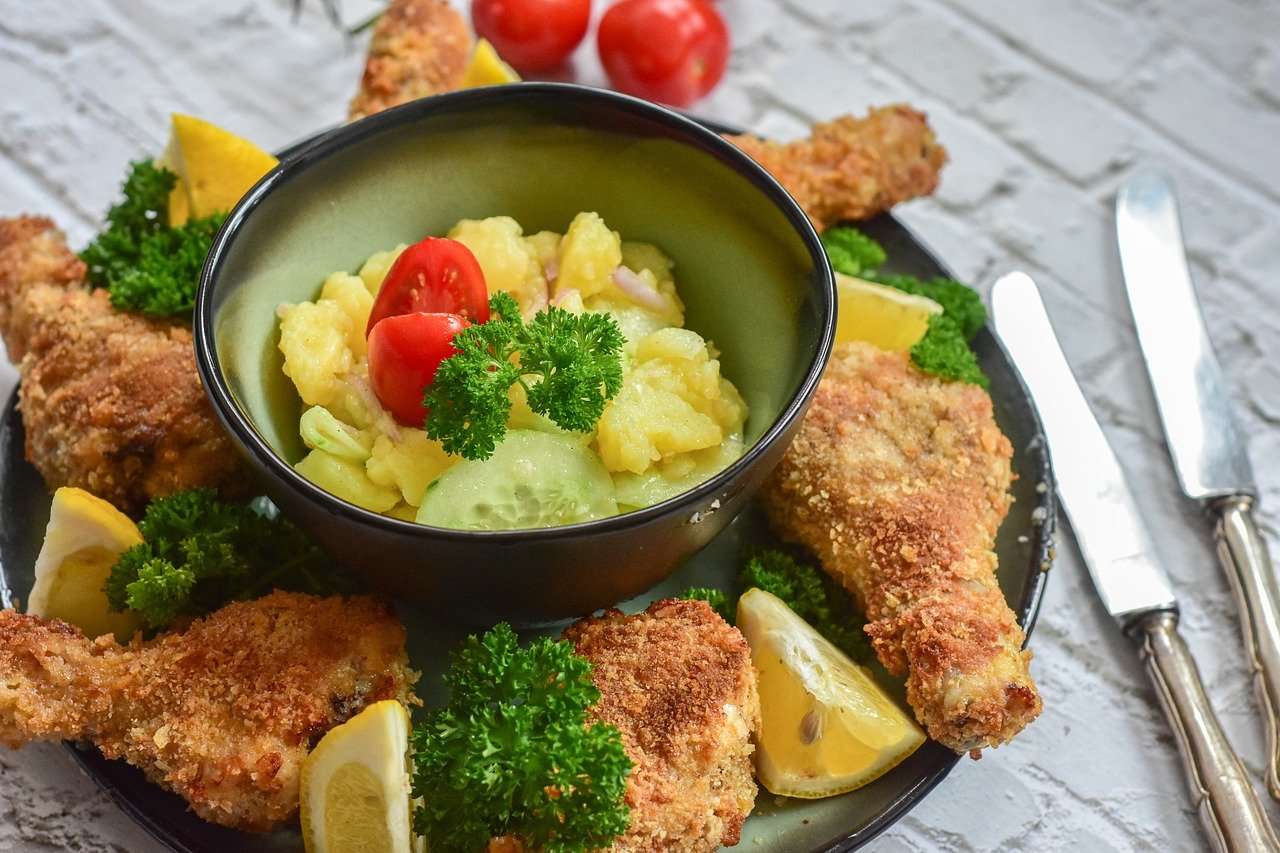
Fried chicken
Here’s a classic fried chicken recipe that’s crispy on the outside and juicy on the inside! # Crispy Fried Chicken Recipe # Ingredients: - **For the Chicken:** - 4 pounds chicken pieces (legs, thighs, breasts, wings) - 2 cups buttermilk - 1 tablespoon hot sauce (optional) - Salt and pepper, to taste - **For the Coating:** - 2 cups all-purpose flour - 1 teaspoon paprika - 1 teaspoon garlic powder - 1 teaspoon onion powder - 1 teaspoon cayenne pepper (optional, for heat) - 1 teaspoon salt - ½ teaspoon black pepper - **For Frying:** - Vegetable oil (for frying) # Instructions: 1. **Marinate the Chicken:** - In a large bowl, combine the buttermilk, hot sauce (if using), salt, and pepper. Add the chicken pieces, ensuring they are fully submerged. Cover and refrigerate for at least 2 hours, or overnight for best results. 2. **Prepare the Coating:** - In another bowl, mix together the flour, paprika, garlic powder, onion powder, cayenne pepper, salt, and black pepper. 3. **Dredge the Chicken:** - Remove the chicken from the buttermilk, allowing excess to drip off. Dredge each piece in the flour mixture, pressing gently to ensure a good coating. Shake off any excess flour. 4. **Heat the Oil:** - In a deep skillet or frying pan, heat about 1 inch of vegetable oil over medium-high heat until it reaches 350°F (175°C). You can test the oil by dropping a small piece of bread in; it should sizzle immediately. 5. **Fry the Chicken:** - Carefully add the chicken pieces to the hot oil, skin-side down, in batches if necessary. Fry for about 10-12 minutes on one side until golden brown, then flip and cook for an additional 8-10 minutes, or until the internal temperature reaches 165°F (74°C) and the chicken is cooked through. 6. **Drain and Serve:** - Once cooked, remove the chicken and place it on a wire rack or paper towels to drain excess oil. Let it rest for a few minutes before serving. Enjoy your delicious homemade fried chicken! 🍗
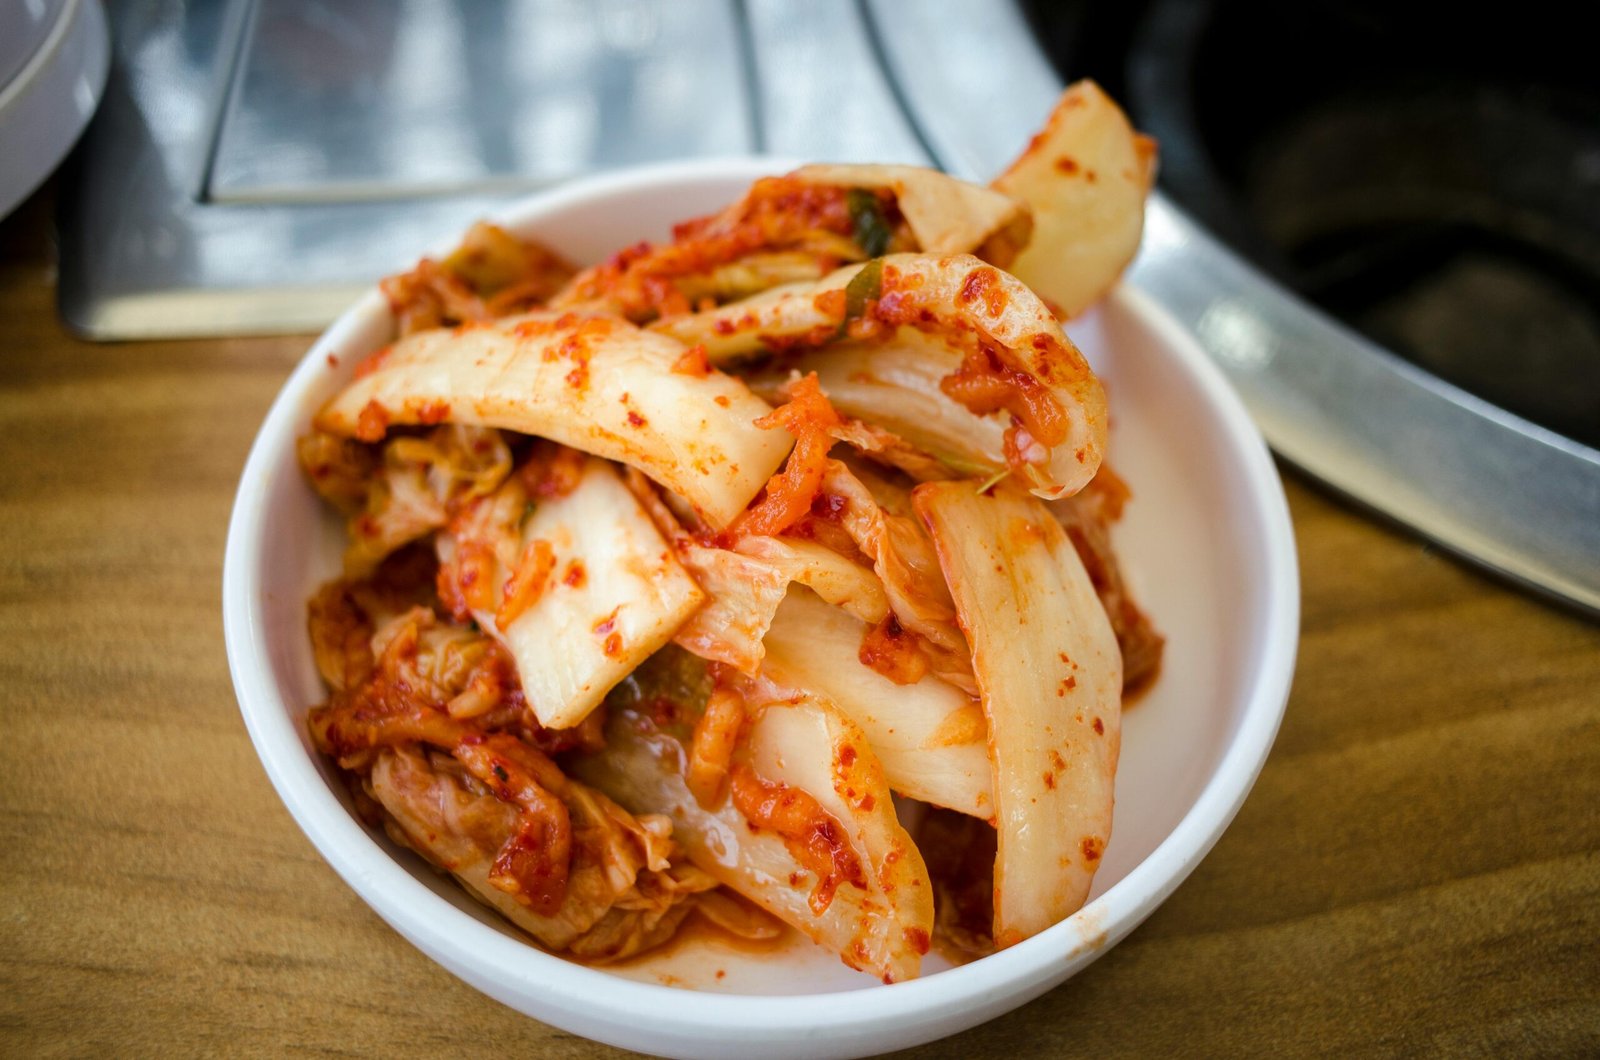
Korean Kimchi
Here's a simple recipe for making traditional Korean kimchi: # Ingredients # For the Kimchi Base: - **1 medium Napa cabbage** - **1/4 cup sea salt** - **Water (enough to soak the cabbage)** - **1 cup daikon radish, julienned** - **2 green onions, chopped** #### For the Kimchi Paste: - **1 tablespoon grated ginger** - **1 tablespoon minced garlic (about 5 cloves)** - **2 tablespoons fish sauce (or soy sauce for a vegetarian option)** - **2 tablespoons sugar** - **3 tablespoons Korean red pepper flakes (gochugaru)** - **1 tablespoon sesame seeds (optional)** # Instructions 1. **Prepare the Cabbage:** - Cut the Napa cabbage in half lengthwise and then into quarters. Rinse thoroughly and soak in a large bowl of water mixed with salt for about 1-2 hours, turning occasionally. 2. **Make the Kimchi Paste:** - In a small bowl, mix the grated ginger, minced garlic, fish sauce, sugar, and gochugaru until it forms a paste. Adjust the spice level by adding more or less gochugaru. 3. **Rinse and Drain the Cabbage:** - After soaking, rinse the cabbage under cold water a couple of times to remove excess salt. Drain well. 4. **Combine Ingredients:** - In a large mixing bowl, combine the drained cabbage, julienned daikon radish, chopped green onions, and kimchi paste. Use gloves to mix thoroughly, ensuring the cabbage and radish are well coated. 5. **Pack the Kimchi:** - Pack the mixture tightly into a clean glass jar or airtight container, leaving some space at the top as the kimchi will expand as it ferments. 6. **Ferment:** - Leave the jar at room temperature for about 1-2 days (depending on your preferred level of fermentation). Then transfer it to the refrigerator. It will continue to ferment slowly in the fridge and can be enjoyed for several weeks. # Tips - Taste the kimchi after a day or two to see if it’s fermented to your liking. - You can customize your kimchi by adding other ingredients like carrots or scallions. Enjoy your homemade kimchi!
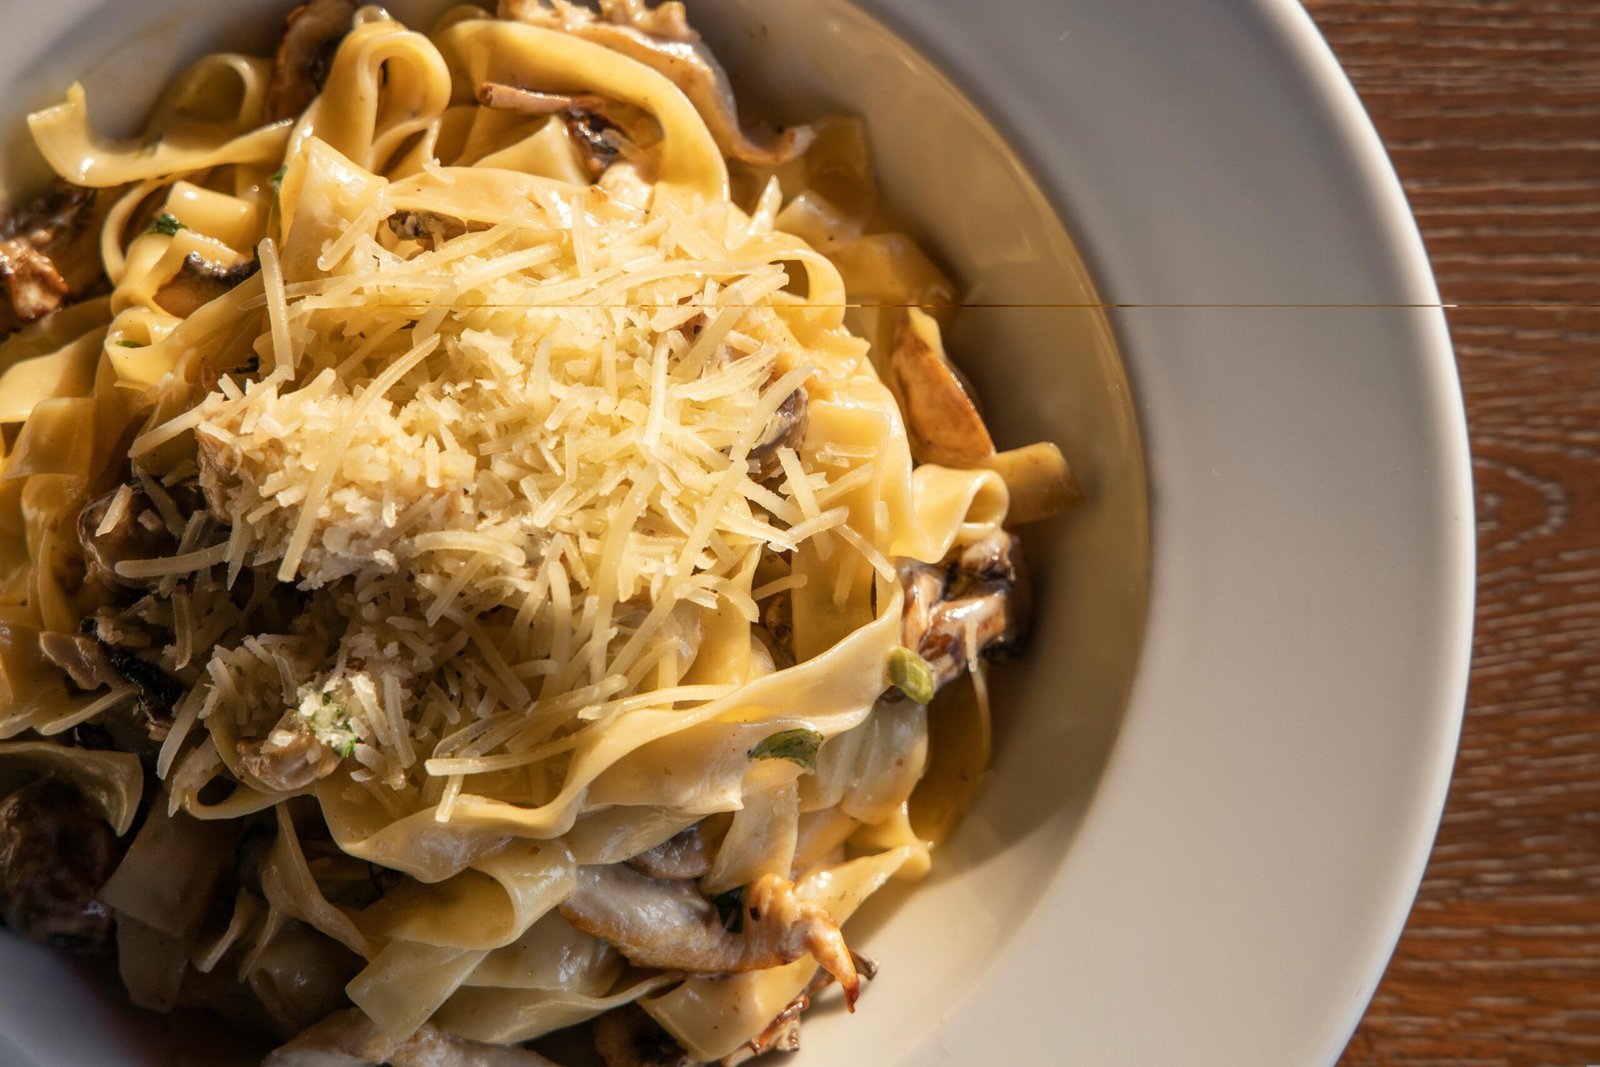
Chicken Alfredo Pasta
Here's a simple and delicious recipe for Chicken Alfredo Pasta: # Ingredients # For the Pasta: - **8 oz fettuccine or your pasta of choice** - **1 tablespoon olive oil** - **2 boneless, skinless chicken breasts** - **Salt and pepper, to taste** # For the Alfredo Sauce: - **1/2 cup (1 stick) unsalted butter** - **1 cup heavy cream** - **2 cups grated Parmesan cheese** - **3 cloves garlic, minced** - **Salt and pepper, to taste** - **Chopped parsley (for garnish, optional)** ### Instructions 1. **Cook the Pasta:** - Bring a large pot of salted water to a boil. Add the fettuccine and cook according to package instructions until al dente. Drain and set aside. 2. **Cook the Chicken:** - In a large skillet, heat olive oil over medium heat. Season the chicken breasts with salt and pepper. Cook for about 6-7 minutes on each side, or until cooked through and no longer pink in the center. Remove from the skillet and let rest for a few minutes before slicing. 3. **Make the Alfredo Sauce:** - In the same skillet, melt the butter over medium heat. Add the minced garlic and sauté for about 1 minute until fragrant. - Pour in the heavy cream and bring to a simmer. Reduce heat to low and stir in the grated Parmesan cheese until melted and smooth. Season with salt and pepper to taste. 4. **Combine:** - Add the cooked pasta to the skillet with the Alfredo sauce. Toss to coat the pasta evenly. If the sauce is too thick, you can add a little pasta water to reach your desired consistency. 5. **Serve:** - Plate the pasta and top with sliced chicken. Garnish with chopped parsley if desired. Enjoy! # Tips - You can add vegetables like broccoli or peas for extra flavor and nutrition. - For a richer flavor, consider using freshly grated Parmesan cheese. Enjoy your creamy Chicken Alfredo Pasta!

Lasagna
Here’s a classic lasagna recipe that’s hearty and delicious! # Ingredients # For the Meat Sauce: - **1 lb ground beef (or Italian sausage)** - **1 medium onion, chopped** - **3 cloves garlic, minced** - **1 can (28 oz) crushed tomatoes** - **2 tablespoons tomato paste** - **1 teaspoon dried oregano** - **1 teaspoon dried basil** - **Salt and pepper, to taste** - **1/4 cup fresh parsley, chopped (optional)** #### For the Cheese Mixture: - **15 oz ricotta cheese** - **1 egg** - **2 cups shredded mozzarella cheese** - **1/2 cup grated Parmesan cheese** - **Salt and pepper, to taste** #### For Assembly: - **9-12 lasagna noodles (depending on your dish)** - **Extra mozzarella cheese for topping (about 1 cup)** ### Instructions 1. **Prepare the Meat Sauce:** - In a large skillet, cook the ground beef over medium heat until browned. Drain excess fat. - Add chopped onion and minced garlic; cook until the onion is soft. - Stir in crushed tomatoes, tomato paste, oregano, basil, salt, and pepper. Simmer for about 20 minutes, allowing the flavors to meld. Add parsley if desired. 2. **Prepare the Cheese Mixture:** - In a bowl, combine ricotta cheese, egg, 1 cup of mozzarella cheese, Parmesan cheese, salt, and pepper. Mix well. 3. **Cook the Lasagna Noodles:** - Cook the lasagna noodles according to package instructions. Drain and set aside. 4. **Assemble the Lasagna:** - Preheat your oven to 375°F (190°C). - In a 9x13 inch baking dish, spread a thin layer of meat sauce on the bottom. - Place a layer of noodles on top, followed by a layer of the ricotta cheese mixture, then a layer of meat sauce. Repeat the layers (noodles, ricotta, meat sauce) until all ingredients are used, finishing with a layer of meat sauce on top. - Sprinkle the remaining mozzarella cheese over the top. 5. **Bake:** - Cover with aluminum foil (to prevent sticking, you can spray the foil with cooking spray). - Bake for 25 minutes, then remove the foil and bake for an additional 15 minutes, or until the cheese is bubbly and golden. 6. **Let it Rest:** - Allow the lasagna to cool for about 10-15 minutes before slicing. This helps the layers hold together. 7. **Serve:** - Garnish with extra parsley or cheese if desired. Enjoy! # Tips - You can add vegetables like spinach or zucchini for extra flavor and nutrition. - Make it ahead of time and refrigerate before baking. Just add a few extra minutes to the baking time if it’s cold from the fridge. Enjoy your delicious homemade lasagna!
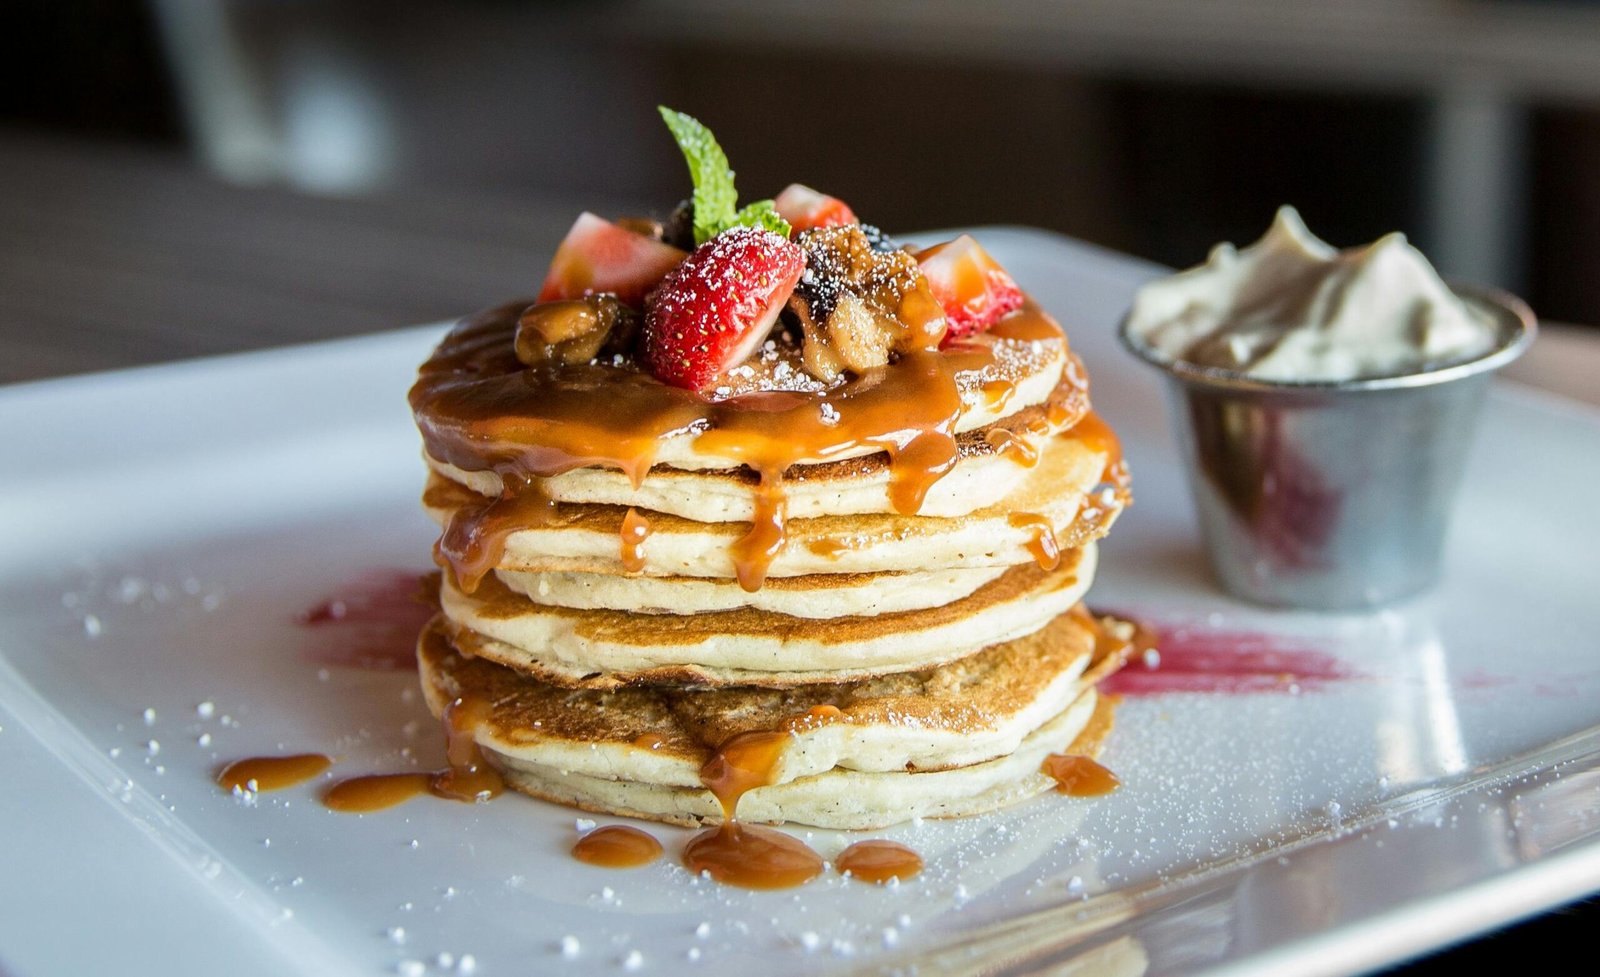
Pancake
Here's a simple and delicious pancake recipe that you can whip up for breakfast! # Ingredients - **1 cup all-purpose flour** - **2 tablespoons sugar** - **2 teaspoons baking powder** - **1/2 teaspoon baking soda** - **1/4 teaspoon salt** - **1 cup buttermilk (or milk)** - **1 large egg** - **2 tablespoons melted butter (plus more for cooking)** - **1 teaspoon vanilla extract (optional)** # Instructions 1. **Mix Dry Ingredients:** - In a large bowl, whisk together the flour, sugar, baking powder, baking soda, and salt. 2. **Combine Wet Ingredients:** - In another bowl, whisk together the buttermilk, egg, melted butter, and vanilla extract. 3. **Combine Mixtures:** - Pour the wet ingredients into the dry ingredients. Stir gently until just combined. It’s okay if there are a few lumps; do not overmix. 4. **Heat the Pan:** - Heat a non-stick skillet or griddle over medium heat. Add a small amount of butter to coat the surface. 5. **Cook the Pancakes:** - Pour about 1/4 cup of batter onto the skillet for each pancake. Cook until bubbles form on the surface (about 2-3 minutes), then flip and cook for another 1-2 minutes until golden brown. 6. **Serve:** - Serve warm with your favorite toppings, such as maple syrup, fresh fruit, or whipped cream. # Tips - For extra fluffy pancakes, let the batter rest for about 5-10 minutes before cooking. - Add-ins like chocolate chips, blueberries, or nuts can be mixed into the batter for variation. Enjoy your fluffy pancakes!

Homemade croissants
Here's a detailed recipe for making buttery, flaky croissants from scratch: # Ingredients # For the Dough: - **4 cups all-purpose flour** - **1/4 cup granulated sugar** - **2 teaspoons salt** - **1 tablespoon instant yeast** - **1 1/4 cups whole milk, warmed (about 110°F or 43°C)** - **1/4 cup unsalted butter, melted** #### For the Butter Layer: - **1 1/2 cups (3 sticks) unsalted butter, cold** ### Instructions # 1. Make the Dough: 1. **Combine Dry Ingredients:** - In a large bowl, whisk together flour, sugar, salt, and yeast. 2. **Mix Wet Ingredients:** - In a separate bowl, mix the warmed milk and melted butter. 3. **Combine:** - Pour the wet mixture into the dry ingredients. Mix until a dough forms. 4. **Knead:** - Turn the dough onto a floured surface and knead for about 5-7 minutes until smooth. 5. **First Rise:** - Place the dough in a lightly greased bowl, cover with plastic wrap, and let it rise in a warm place for about 1-1.5 hours or until doubled in size. # 2. Prepare the Butter Layer: 1. **Shape the Butter:** - Place the cold butter between two sheets of parchment paper. Use a rolling pin to pound it into a rectangle (about 8x10 inches) and 1/2 inch thick. Chill in the refrigerator while the dough rises. #### 3. Roll and Fold: 1. **Roll Out the Dough:** - Once the dough has risen, punch it down and turn it out onto a floured surface. Roll it into a rectangle (about 10x15 inches). 2. **Add Butter:** - Place the chilled butter rectangle in the center of the dough. Fold the dough over the butter, sealing the edges. 3. **Roll and Fold (Turns):** - Roll the dough out into a long rectangle (about 10x20 inches). Fold it into thirds (like a letter) and wrap it in plastic. Chill for 30 minutes. - Repeat this rolling and folding process two more times (for a total of three turns), chilling the dough for 30 minutes between each turn. #### 4. Shape the Croissants: 1. **Final Roll:** - After the final chill, roll the dough into a large rectangle (about 10x30 inches) and trim the edges for a clean shape. 2. **Cut the Triangles:** - Cut the dough into triangles (about 4-5 inches wide at the base). You can also make them smaller for mini croissants. 3. **Shape:** - Starting at the base of each triangle, roll it up towards the point, gently stretching the dough as you go. Bend the ends slightly to form a crescent shape. # 5. Final Rise: - Place the shaped croissants on a baking sheet lined with parchment paper. Cover loosely with plastic wrap and let them rise for about 1-2 hours until puffy. #### 6. Bake: 1. **Preheat the Oven:** - Preheat your oven to 400°F (200°C). 2. **Egg Wash:** - Brush the croissants with a beaten egg mixed with a little water for a golden finish. 3. **Bake:** - Bake for 15-20 minutes or until golden brown and flaky. 4. **Cool:** - Let them cool slightly on a wire rack before serving. # Tips - For extra flakiness, make sure your butter stays cold throughout the process. - Croissants can be frozen after shaping. Just allow them to rise and bake directly from the freezer, adding a few extra minutes to the baking time. Enjoy your homemade croissants! They’re perfect fresh out of the oven! 🥐
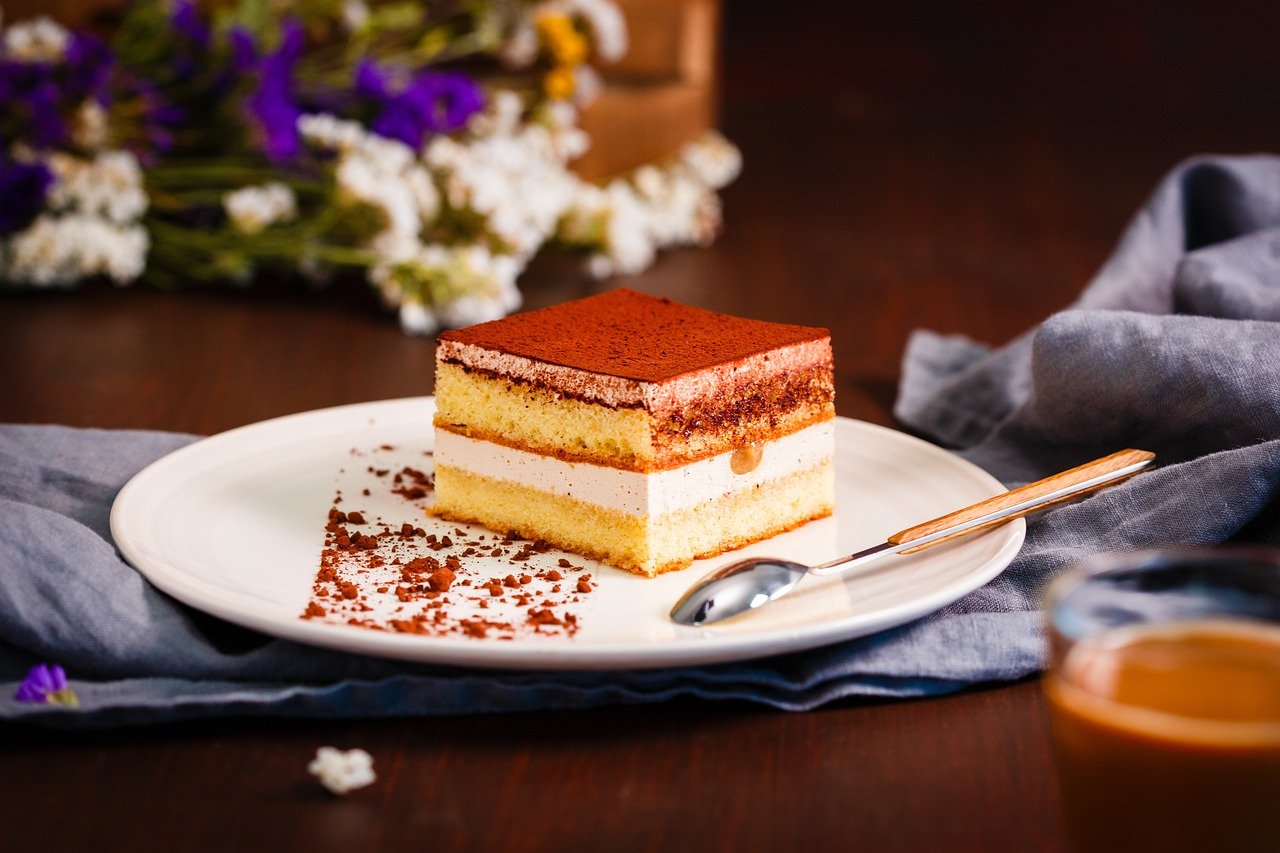
Tiramisu
Here's a classic recipe for delicious tiramisu! ### Ingredients #### For the Coffee Mixture: - **1 cup brewed espresso or strong coffee, cooled** - **2 tablespoons coffee liqueur (optional)** - **1 tablespoon sugar (optional, adjust to taste)** #### For the Mascarpone Mixture: - **4 large egg yolks** - **1/2 cup granulated sugar** - **2/3 cup milk** - **1 1/4 cups mascarpone cheese** - **1 cup heavy cream** #### For Assembly: - **24-30 ladyfinger cookies** - **Cocoa powder (for dusting)** - **Dark chocolate shavings (optional, for garnish)** # Instructions # 1. Prepare the Coffee Mixture: - In a bowl, combine the cooled espresso, coffee liqueur, and sugar (if using). Set aside. # 2. Make the Mascarpone Mixture: 1. **Heat Milk:** - In a saucepan over medium heat, combine the milk and 1/4 cup sugar. Stir until the sugar dissolves and the mixture is hot but not boiling. 2. **Whisk Egg Yolks:** - In a separate bowl, whisk the egg yolks and remaining sugar until pale and creamy. 3. **Combine:** - Slowly whisk the hot milk mixture into the egg yolks, then return to the saucepan. Cook over low heat, stirring constantly until thickened (about 5-7 minutes). Do not let it boil. 4. **Cool:** - Remove from heat and let cool slightly. Then fold in the mascarpone cheese until smooth. 5. **Whip the Cream:** - In a separate bowl, whip the heavy cream until stiff peaks form. Gently fold the whipped cream into the mascarpone mixture until combined. #### 3. Assemble the Tiramisu: 1. **Dip Ladyfingers:** - Quickly dip each ladyfinger into the coffee mixture (do not soak) and layer them in the bottom of a 9x9-inch (or similar) dish. 2. **Layer:** - Spread half of the mascarpone mixture over the ladyfingers. Repeat with another layer of dipped ladyfingers and then top with the remaining mascarpone mixture. 3. **Chill:** - Cover and refrigerate for at least 4 hours (or overnight) to set. #### 4. Serve: - Before serving, dust the top with cocoa powder and garnish with chocolate shavings if desired. # Tips - Use high-quality coffee for the best flavor. - For a non-alcoholic version, simply omit the coffee liqueur. Enjoy your homemade tiramisu! It's a delightful treat that’s sure to impress!
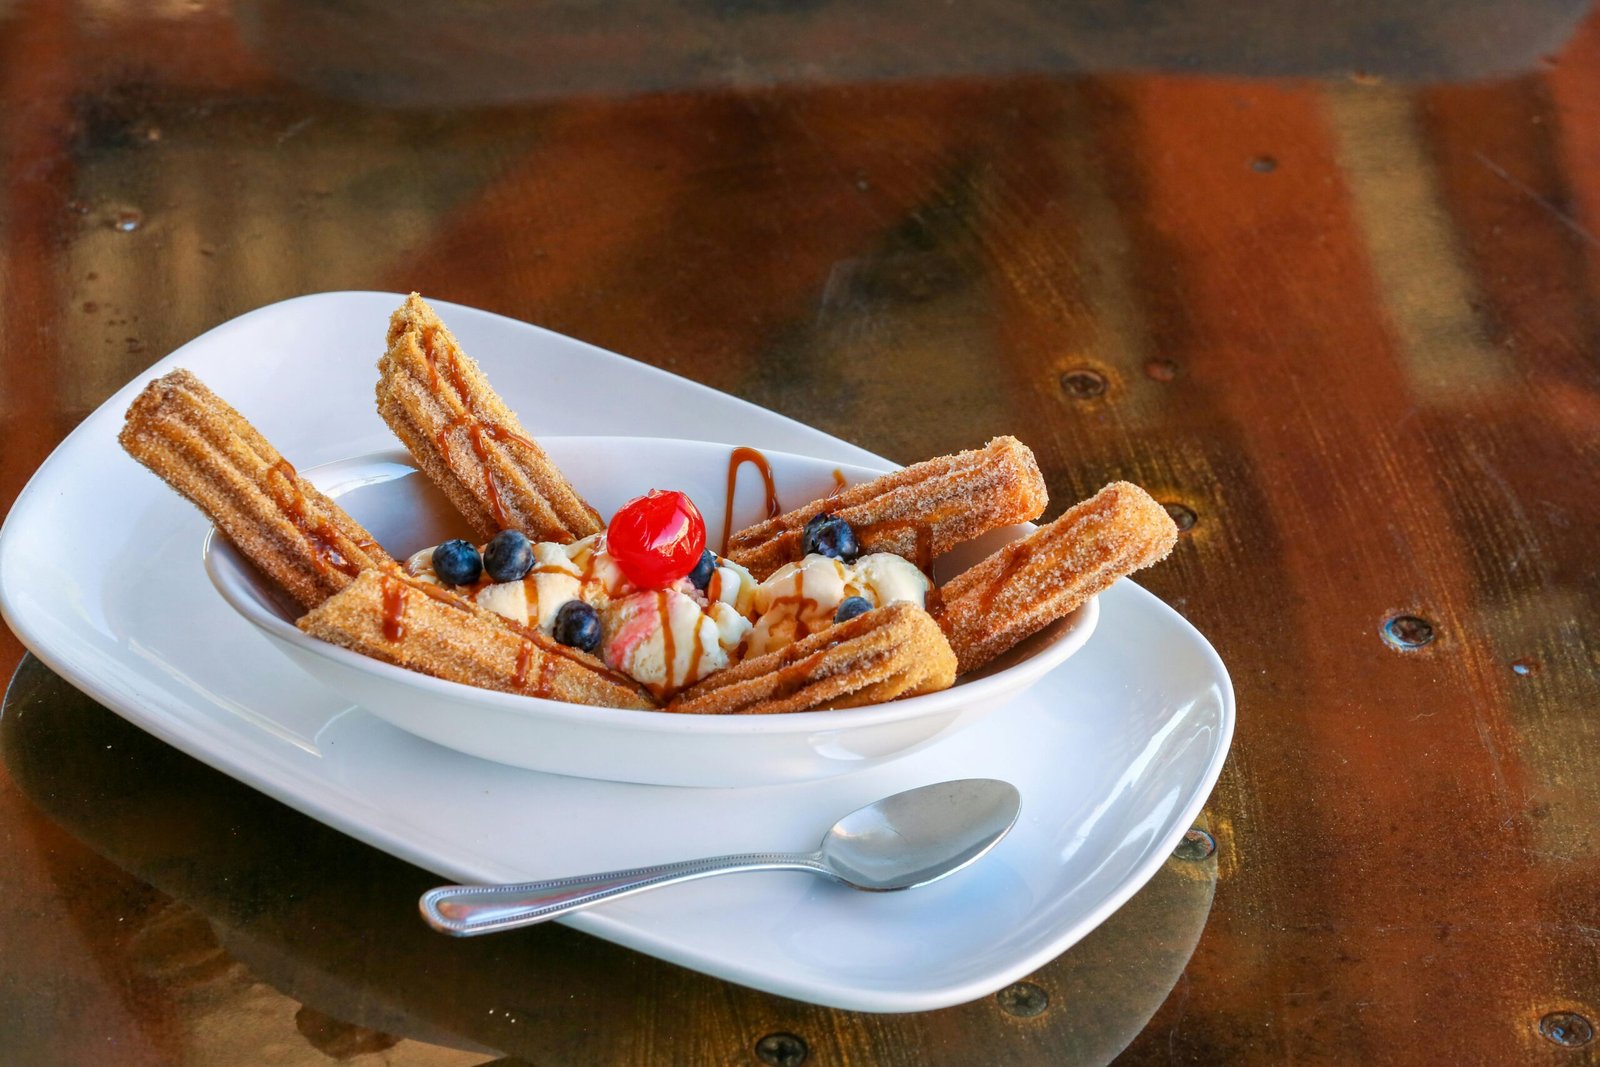
Churros
Here’s a simple and delicious recipe for making churros at home! # Ingredients # For the Churros: - **1 cup water** - **1/2 cup unsalted butter** - **1 tablespoon sugar** - **1/4 teaspoon salt** - **1 cup all-purpose flour** - **2 large eggs** - **1 teaspoon vanilla extract (optional)** # For the Sugar Coating: - **1/2 cup granulated sugar** - **1 teaspoon ground cinnamon** # For Frying: - **Vegetable oil (for frying)** # Instructions # 1. Prepare the Dough: 1. **Heat Mixture:** - In a saucepan over medium heat, combine water, butter, sugar, and salt. Bring to a boil. 2. **Add Flour:** - Remove from heat and quickly stir in the flour until the mixture forms a ball. Let it cool slightly. 3. **Mix in Eggs:** - Add the eggs one at a time, mixing well after each addition. Stir in vanilla extract if using. The dough should be smooth and thick. # 2. Heat Oil: - In a deep skillet or pot, heat about 2 inches of vegetable oil over medium-high heat (around 350°F or 175°C). # 3. Pipe the Churros: 1. **Prepare Piping Bag:** - Transfer the dough to a piping bag fitted with a star tip. 2. **Pipe Churros:** - Once the oil is hot, carefully pipe strips of dough (about 4-6 inches long) directly into the hot oil. Fry a few at a time, being careful not to overcrowd the pan. # 4. Fry: - Fry the churros for about 2-3 minutes on each side or until golden brown. Use tongs to turn them as needed. #### 5. Drain and Coat: 1. **Remove:** - Use a slotted spoon to remove the churros from the oil and place them on paper towels to drain. 2. **Coat:** - In a shallow dish, mix the sugar and cinnamon together. Roll the hot churros in the mixture until fully coated. #### 6. Serve: - Enjoy warm with chocolate sauce, caramel, or dulce de leche for dipping! # Tips - For extra flavor, you can add a pinch of nutmeg to the sugar coating. - Make sure the oil is hot enough to prevent the churros from becoming greasy. Enjoy your homemade churros! They’re perfect for sharing or indulging on your own! 🌟

Brownie
Here’s a classic brownie recipe that’s rich, fudgy, and super easy to make! # Ingredients - **1/2 cup (1 stick) unsalted butter** - **1 cup granulated sugar** - **2 large eggs** - **1 teaspoon vanilla extract** - **1/3 cup unsweetened cocoa powder** - **1/2 cup all-purpose flour** - **1/4 teaspoon salt** - **1/4 teaspoon baking powder** - **1/2 cup chocolate chips or nuts (optional)** # Instructions # 1. Preheat the Oven: - Preheat your oven to 350°F (175°C). Grease or line an 8x8-inch baking pan with parchment paper. # 2. Melt the Butter: - In a medium saucepan, melt the butter over low heat. Remove from heat and stir in the sugar until well combined. # 3. Add Eggs and Vanilla: - Allow the mixture to cool slightly, then add the eggs one at a time, mixing well after each addition. Stir in the vanilla extract. # 4. Mix Dry Ingredients: - In a separate bowl, whisk together the cocoa powder, flour, salt, and baking powder. #### 5. Combine: - Gradually stir the dry ingredients into the wet mixture until just combined. Do not overmix. Fold in chocolate chips or nuts if using. #### 6. Bake: - Pour the batter into the prepared baking pan and spread evenly. Bake for 20-25 minutes or until a toothpick inserted in the center comes out with a few moist crumbs (not wet batter). # 7. Cool and Serve: - Let the brownies cool in the pan before cutting into squares. Enjoy them warm or at room temperature! #Tips - For extra fudginess, be careful not to overbake. - You can add a sprinkle of sea salt on top before baking for a sweet and salty flavor. Enjoy your delicious homemade brownies! 🍫
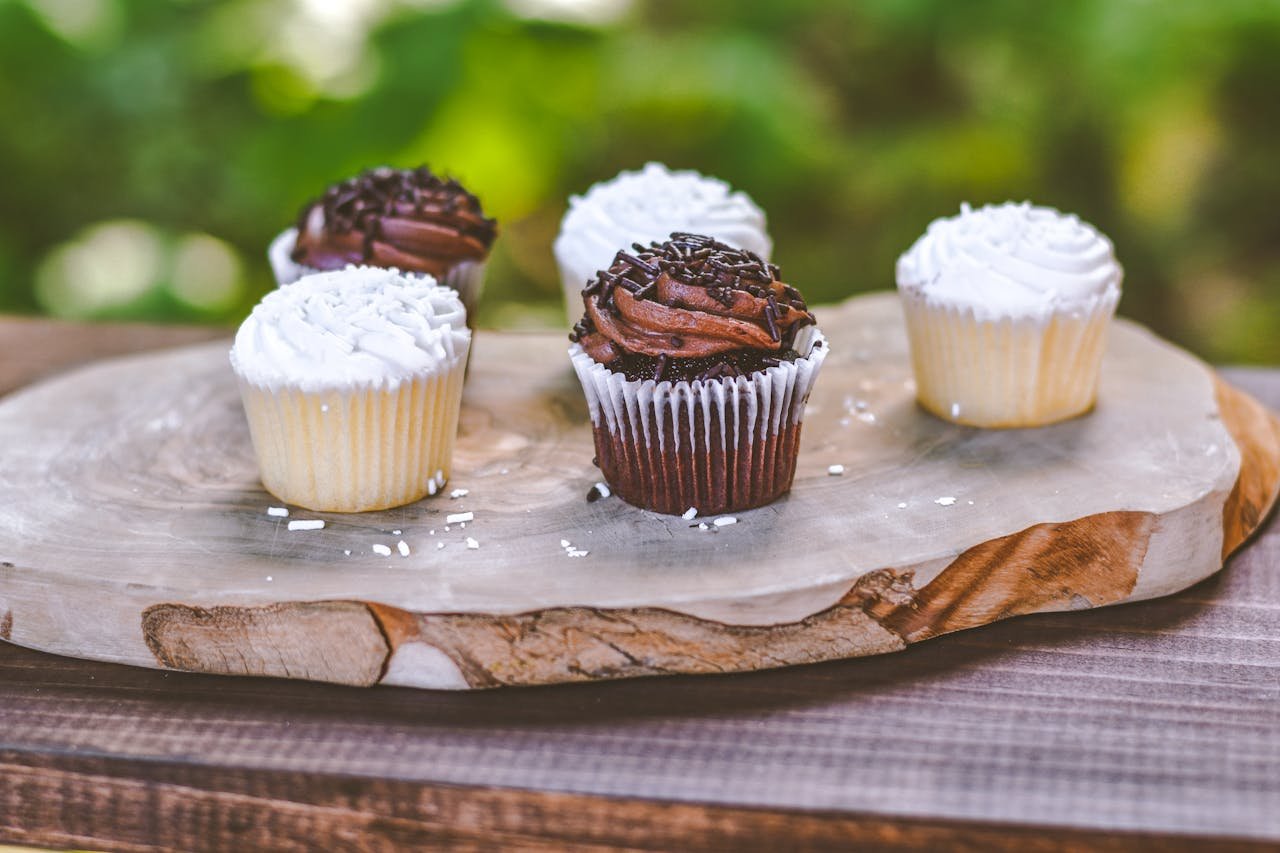
Cupcake
Here’s a classic vanilla cupcake recipe that’s easy to make and perfect for any occasion! ### Ingredients #### For the Cupcakes: - **1 1/2 cups all-purpose flour** - **1 cup granulated sugar** - **1 1/2 teaspoons baking powder** - **1/2 teaspoon baking soda** - **1/4 teaspoon salt** - **1/2 cup unsalted butter, softened** - **2 large eggs** - **1 teaspoon vanilla extract** - **1/2 cup milk** #### For the Frosting: - **1/2 cup (1 stick) unsalted butter, softened** - **2 cups powdered sugar** - **1 teaspoon vanilla extract** - **2 tablespoons milk (or more for desired consistency)** ### Instructions #### 1. Preheat the Oven: - Preheat your oven to 350°F (175°C). Line a cupcake pan with paper liners. #### 2. Mix Dry Ingredients: - In a large bowl, whisk together the flour, sugar, baking powder, baking soda, and salt. #### 3. Cream Butter: - In another bowl, beat the softened butter until creamy. Gradually add the dry ingredients and mix until combined. #### 4. Add Eggs and Vanilla: - Add the eggs, vanilla extract, and milk to the butter mixture. Beat on medium speed until smooth and well combined. #### 5. Fill Cupcake Liners: - Divide the batter evenly among the cupcake liners, filling each about 2/3 full. #### 6. Bake: - Bake for 18-20 minutes, or until a toothpick inserted into the center comes out clean. Let them cool in the pan for a few minutes before transferring to a wire rack to cool completely. #### 7. Make the Frosting: 1. **Beat Butter:** - In a bowl, beat the softened butter until creamy. 2. **Add Sugar and Vanilla:** - Gradually add powdered sugar and vanilla, mixing until smooth. Add milk, one tablespoon at a time, until you reach your desired consistency. #### 8. Frost and Serve: - Once the cupcakes are completely cool, frost them with the buttercream using a piping bag or a knife. Decorate as desired! ### Tips - You can add food coloring to the frosting for a fun twist. - Try adding sprinkles or other toppings for a festive look! Enjoy your delicious homemade cupcakes! 🧁✨
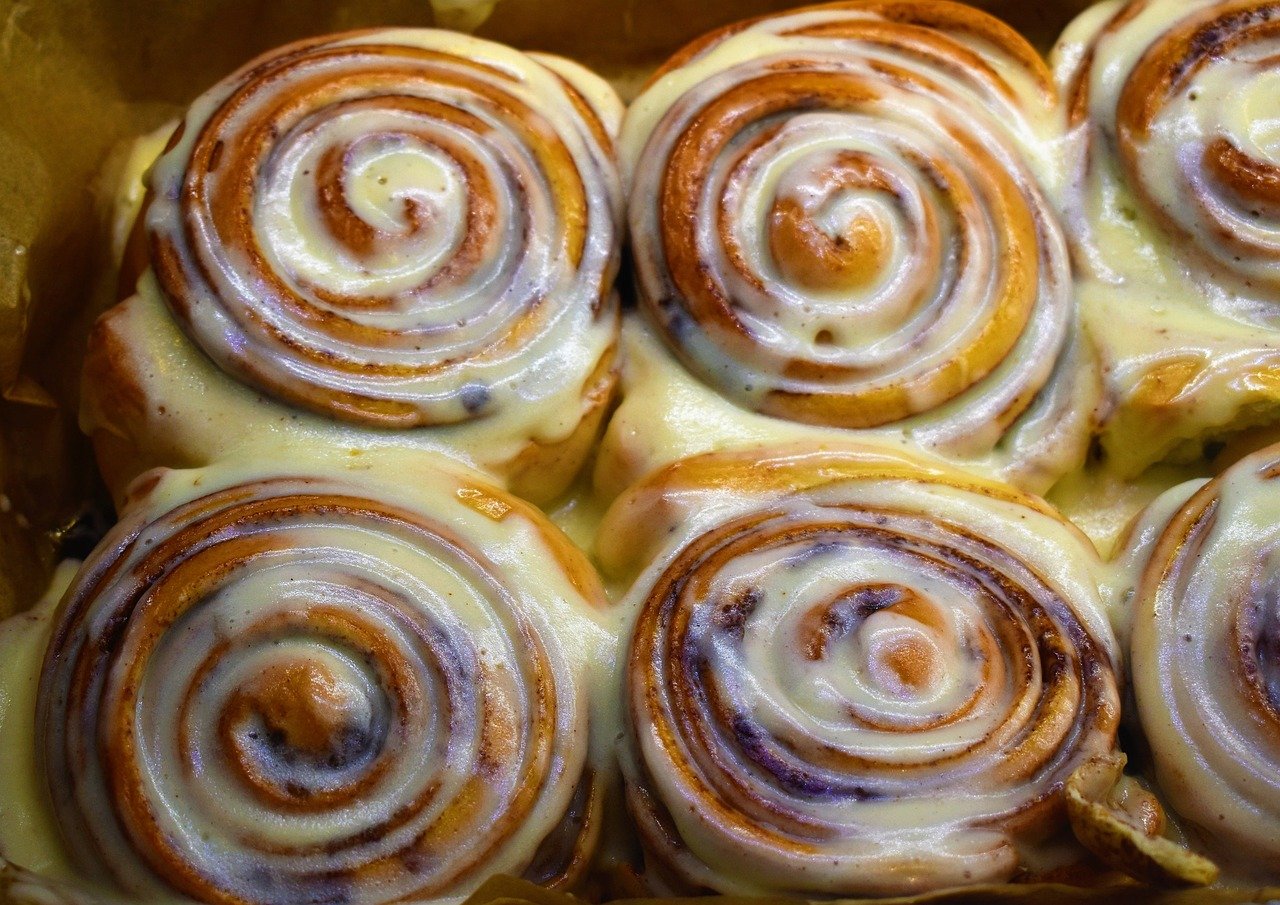
Cinnabon
Here’s a delicious recipe for making homemade cinnamon rolls (Cinnabons) with a sweet cream cheese frosting! # Ingredients # For the Dough: - **4 cups all-purpose flour** - **1 packet (2 1/4 teaspoons) instant yeast** - **1/2 cup granulated sugar** - **1 teaspoon salt** - **1/2 cup whole milk, warmed (110°F or 43°C)** - **1/4 cup water, warmed (110°F or 43°C)** - **1/4 cup unsalted butter, melted** - **2 large eggs** #### For the Filling: - **1/2 cup unsalted butter, softened** - **1 cup brown sugar, packed** - **2 tablespoons ground cinnamon** - **1/2 cup chopped nuts (optional)** # For the Cream Cheese Frosting: - **4 oz cream cheese, softened** - **1/4 cup unsalted butter, softened** - **1 cup powdered sugar** - **1 teaspoon vanilla extract** - **2-3 tablespoons milk (to adjust consistency)** # Instructions # 1. Prepare the Dough: 1. **Mix Dry Ingredients:** - In a large bowl, whisk together 2 cups of flour, yeast, sugar, and salt. 2. **Combine Wet Ingredients:** - In a separate bowl, mix the warmed milk, water, melted butter, and eggs. 3. **Combine Mixtures:** - Pour the wet mixture into the dry ingredients. Stir to combine, then gradually add the remaining flour until a dough forms. 4. **Knead:** - Turn the dough onto a floured surface and knead for about 5-7 minutes until smooth and elastic. 5. **First Rise:** - Place the dough in a greased bowl, cover with a cloth, and let it rise in a warm place for about 1-2 hours or until doubled in size. # 2. Make the Filling: - In a bowl, mix the softened butter, brown sugar, and cinnamon until well combined. Set aside. # 3. Roll Out the Dough: 1. **Shape the Dough:** - Once the dough has risen, punch it down and turn it out onto a floured surface. Roll it into a rectangle (about 16x12 inches). 2. **Spread Filling:** - Spread the cinnamon filling evenly over the dough, leaving a small border around the edges. # 4. Roll and Cut: 1. **Roll Up:** - Starting from the long edge, carefully roll the dough into a tight log. 2. **Cut Rolls:** - Slice the log into 12 equal pieces (about 1.5 inches each). Place them in a greased 9x13-inch baking dish or on a baking sheet lined with parchment paper. # 5. Second Rise: - Cover the rolls with a cloth and let them rise again for about 30-45 minutes, until puffy. # 6. Bake: - Preheat your oven to 350°F (175°C). Bake the rolls for 25-30 minutes, or until golden brown. # 7. Make the Cream Cheese Frosting: 1. **Mix Ingredients:** - In a bowl, beat together the softened cream cheese and butter until smooth. Gradually add the powdered sugar, vanilla extract, and milk until you reach your desired consistency. # 8. Frost and Serve: - Once the cinnamon rolls are baked and slightly cooled, spread the cream cheese frosting generously over the top. Serve warm and enjoy! #Tips - For extra gooeyness, you can add raisins or chopped apples to the filling. - Make the dough the night before and let it rise in the fridge overnight for a quick bake in the morning. Enjoy your homemade Cinnabons! 🍥✨
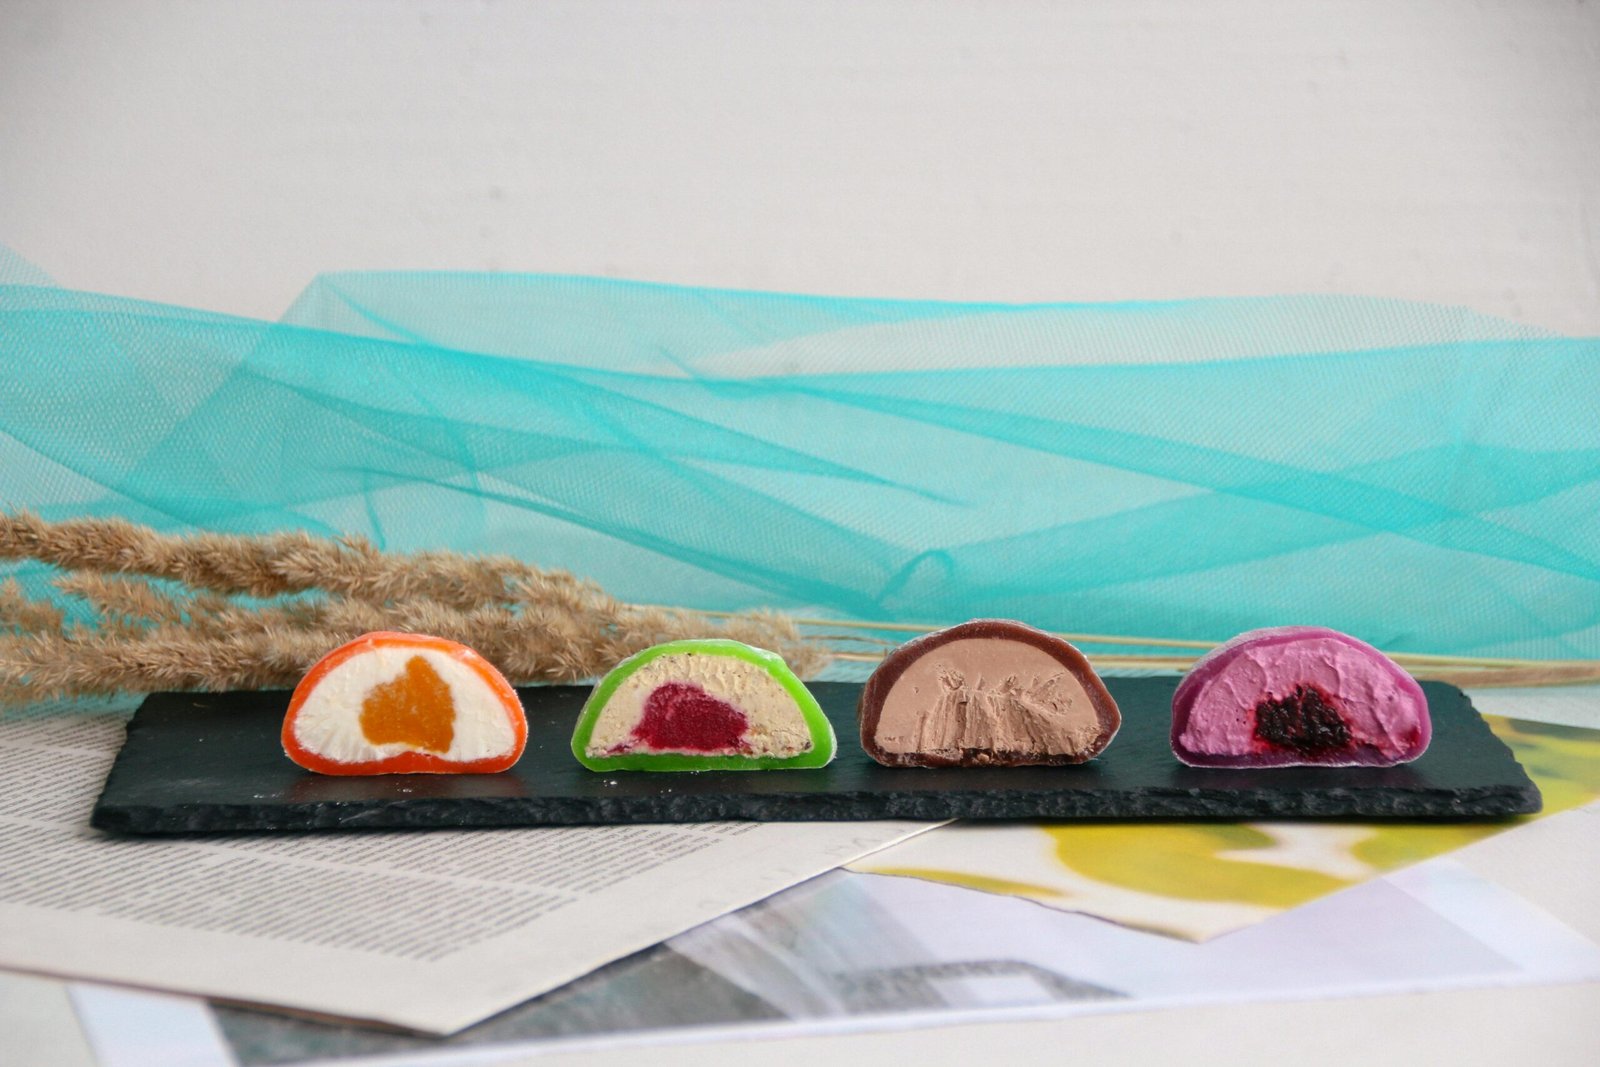
Mochi cake
Here’s a simple and delicious recipe for mochi cake, a delightful dessert with a chewy texture and rich flavor! # Ingredients - **1 cup sweet rice flour (mochi flour)** - **1 cup granulated sugar** - **1 teaspoon baking powder** - **1/4 teaspoon salt** - **1 cup coconut milk (or regular milk)** - **1/4 cup unsalted butter, melted** - **2 large eggs** - **1 teaspoon vanilla extract** #Instructions #1. Preheat the Oven: - Preheat your oven to 350°F (175°C). Grease an 8x8-inch baking dish or line it with parchment paper. # 2. Mix Dry Ingredients: - In a large bowl, whisk together the sweet rice flour, sugar, baking powder, and salt until well combined. # 3. Combine Wet Ingredients: - In another bowl, whisk together the coconut milk, melted butter, eggs, and vanilla extract. # 4. Combine Mixtures: - Pour the wet mixture into the dry ingredients and stir until smooth and well combined. # 5. Bake: - Pour the batter into the prepared baking dish and spread it evenly. Bake for 30-35 minutes or until the top is lightly golden and a toothpick inserted in the center comes out clean. #### 6. Cool and Serve: - Allow the mochi cake to cool in the pan for about 10 minutes, then transfer it to a wire rack to cool completely. Cut into squares and enjoy! #Tips - For extra flavor, consider adding shredded coconut or fruit (like blueberries or strawberries) to the batter. - Serve with whipped cream or a drizzle of chocolate sauce for an extra treat! Enjoy your mochi cake! 🍰✨

Macarons
Here’s a classic recipe for making French macarons—delicate and delicious! # Ingredients # For the Macaron Shells: - **1 cup (100g) powdered sugar** - **3/4 cup (75g) almond flour** - **2 large egg whites (about 70g), aged for 24 hours at room temperature** - **1/4 cup (50g) granulated sugar** - **1/4 teaspoon cream of tartar (optional)** - **Food coloring (optional)** #### For the Filling: - **1/2 cup (115g) unsalted butter, softened** - **1 1/2 cups (180g) powdered sugar** - **1 teaspoon vanilla extract** - **1-2 tablespoons heavy cream (to adjust consistency)** - **Flavoring or food coloring (optional)** # Instructions # 1. Prepare the Macaron Shells: 1. **Sift Dry Ingredients:** - In a bowl, sift together the powdered sugar and almond flour to remove any lumps. Set aside. 2. **Whip Egg Whites:** - In a clean, dry bowl, beat the egg whites until frothy. Add the cream of tartar if using. Gradually add the granulated sugar while continuing to beat until stiff peaks form and the mixture is glossy. 3. **Add Food Coloring:** - If using, add food coloring and mix until evenly incorporated. 4. **Combine Mixtures:** - Gently fold the sifted dry ingredients into the egg white mixture in three additions. Use a spatula to fold until the mixture flows like lava—this should take about 30-50 folds. 5. **Pipe the Shells:** - Transfer the batter to a piping bag fitted with a round tip. Pipe 1.5-inch circles onto a baking sheet lined with parchment paper or a silicone mat, leaving space between each. 6. **Rest:** - Let the piped macarons rest at room temperature for 30-60 minutes, until a skin forms on the surface. They should not stick to your finger when touched. # 2. Bake: - Preheat your oven to 300°F (150°C). Bake the macarons for 15-20 minutes, rotating the tray halfway through. They should rise and form a “foot.” Allow them to cool completely on the baking sheet before removing. #3. Prepare the Filling: 1. **Make the Buttercream:** - In a bowl, beat the softened butter until creamy. Gradually add the powdered sugar, mixing until combined. Add the vanilla extract and heavy cream to reach your desired consistency. 2. **Flavor the Filling:** - If desired, you can add additional flavoring or coloring to the buttercream. # 4. Assemble the Macarons: 1. **Pair Shells:** - Match macaron shells by size. 2. **Fill:** - Pipe a small amount of filling onto the flat side of one shell, then gently press the other shell on top to create a sandwich. # 5. Age and Serve: - For best flavor, let the filled macarons sit in the fridge for 24 hours before serving. Allow them to come to room temperature before enjoying. #Tips - Use a kitchen scale for accurate measurements. - Ensure your mixing bowl and beaters are completely grease-free when whipping egg whites. - Experiment with different fillings, like ganache, fruit preserves, or flavored buttercreams. Enjoy your delightful homemade macarons! 🎉
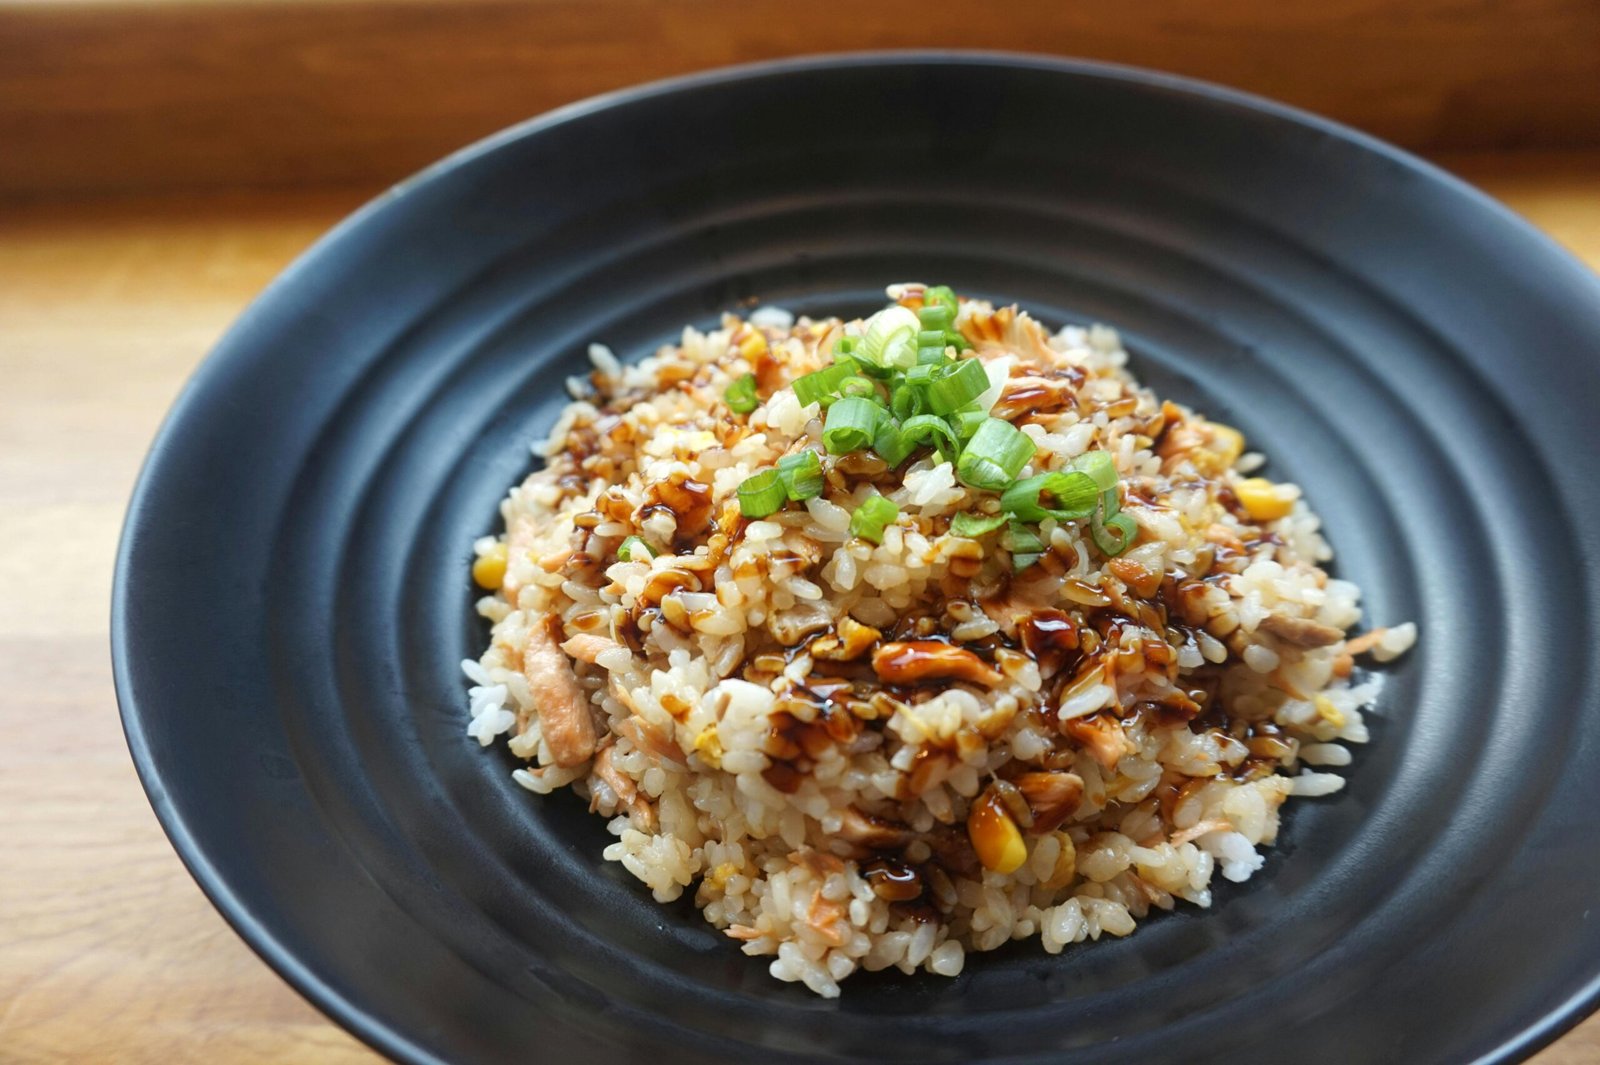
Fried Rice
Here’s a tasty and easy recipe for fried rice that you can customize with your favorite ingredients! # Ingredients - **2 cups cooked rice (preferably day-old)** - **2 tablespoons vegetable oil (divided)** - **2 large eggs, beaten** - **1 cup mixed vegetables (e.g., peas, carrots, bell peppers)** - **1 small onion, diced** - **2-3 cloves garlic, minced** - **3-4 green onions, sliced** - **3 tablespoons soy sauce (adjust to taste)** - **1 tablespoon oyster sauce (optional)** - **Salt and pepper, to taste** - **Protein (optional: cooked chicken, shrimp, or tofu)** # Instructions #### 1. Prepare Ingredients: - If using day-old rice, break up any clumps. Make sure all ingredients are prepped and ready. # 2. Scramble the Eggs: 1. **Heat Oil:** - In a large skillet or wok, heat 1 tablespoon of vegetable oil over medium-high heat. 2. **Add Eggs:** - Pour in the beaten eggs and scramble until fully cooked. Remove from the pan and set aside. # 3. Stir-Fry Vegetables: 1. **Add More Oil:** - In the same pan, add the remaining tablespoon of oil. 2. **Cook Onions and Garlic:** - Add the diced onion and minced garlic. Sauté for about 2-3 minutes until the onion is translucent. 3. **Add Mixed Vegetables:** - Stir in the mixed vegetables and cook for another 3-5 minutes until they are heated through. # 4. Add Rice and Seasonings: 1. **Add Cooked Rice:** - Add the cooked rice to the pan, breaking apart any clumps. Stir well to combine with the vegetables. 2. **Add Sauces:** - Pour in the soy sauce and oyster sauce (if using). Mix thoroughly to coat the rice evenly. 3. **Add Scrambled Eggs and Protein:** - Return the scrambled eggs to the pan and add any cooked protein if using. Stir to combine. # 5. Final Touches: - Add sliced green onions and season with salt and pepper to taste. Stir everything together for another minute to heat through. # 6. Serve: - Serve hot and enjoy your delicious fried rice! # Tips - Customize with your favorite proteins and vegetables. - For extra flavor, you can add a splash of sesame oil or chili sauce. - Leftover fried rice tastes even better the next day! Enjoy your homemade fried rice! 🍚✨
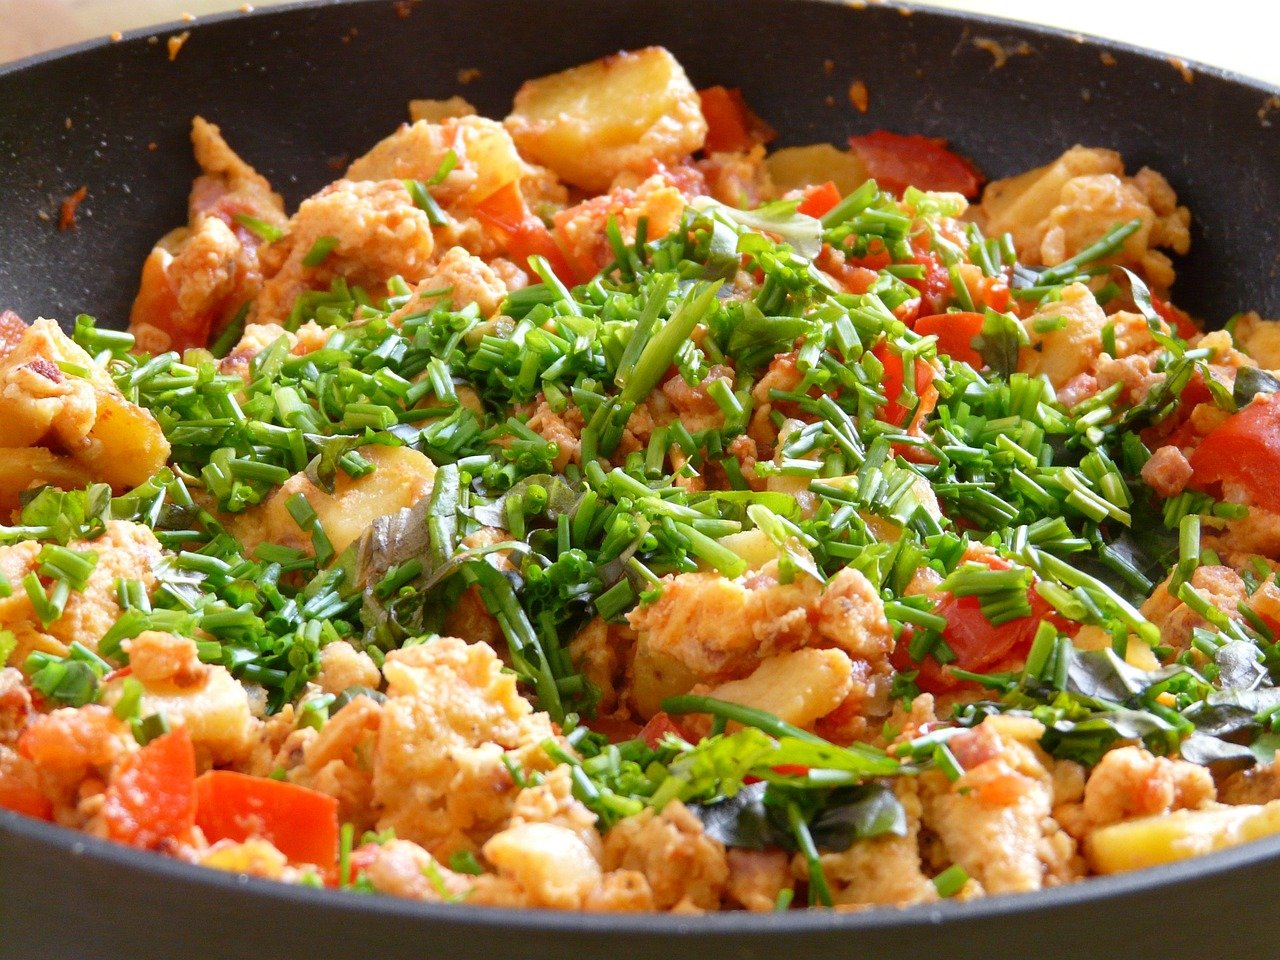
Chicken with Mixed Vegetable Stir Fry
Here’s a simple and flavorful recipe for chicken with mixed vegetable stir-fry! #Ingredients # For the Stir-Fry: - **1 lb (450g) chicken breast, thinly sliced** - **2 tablespoons soy sauce** - **1 tablespoon cornstarch** - **2 tablespoons vegetable oil (divided)** - **2 cups mixed vegetables (e.g., bell peppers, broccoli, carrots, snap peas)** - **3 cloves garlic, minced** - **1 inch ginger, minced (optional)** - **1 tablespoon oyster sauce (optional)** - **Salt and pepper, to taste** # For the Sauce: - **3 tablespoons soy sauce** - **1 tablespoon sesame oil** - **1 tablespoon rice vinegar or white vinegar** - **1 tablespoon honey or sugar (optional)** - **1 teaspoon chili paste or sauce (optional, for heat)** # Instructions # 1. Marinate the Chicken: - In a bowl, combine the sliced chicken, soy sauce, and cornstarch. Mix well and let it marinate for about 15-20 minutes. # 2. Prepare the Sauce: - In a small bowl, whisk together the soy sauce, sesame oil, rice vinegar, honey (if using), and chili paste. Set aside. # 3. Stir-Fry the Chicken: 1. **Heat Oil:** - In a large skillet or wok, heat 1 tablespoon of vegetable oil over medium-high heat. 2. **Cook Chicken:** - Add the marinated chicken to the pan in a single layer. Stir-fry for about 5-7 minutes until the chicken is cooked through and lightly browned. Remove the chicken from the pan and set aside. # 4. Stir-Fry the Vegetables: 1. **Add More Oil:** - In the same pan, add the remaining tablespoon of vegetable oil. 2. **Add Garlic and Ginger:** - Add minced garlic and ginger (if using) to the pan. Sauté for about 30 seconds until fragrant. 3. **Add Vegetables:** - Add the mixed vegetables and stir-fry for about 3-5 minutes, or until they are tender-crisp. #### 5. Combine and Serve: 1. **Return Chicken:** - Add the cooked chicken back to the pan. 2. **Add Sauce:** - Pour the prepared sauce over the chicken and vegetables. Stir well to combine and heat through for another minute. 3. **Season:** - Adjust seasoning with salt and pepper to taste. # 6. Serve: - Serve the chicken and vegetable stir-fry hot over cooked rice or noodles. # Tips - Feel free to customize the vegetables based on what you have on hand. - For added flavor, sprinkle sesame seeds or chopped green onions on top before serving. Enjoy your delicious chicken with mixed vegetable stir-fry! 🍽️🥦🥕.
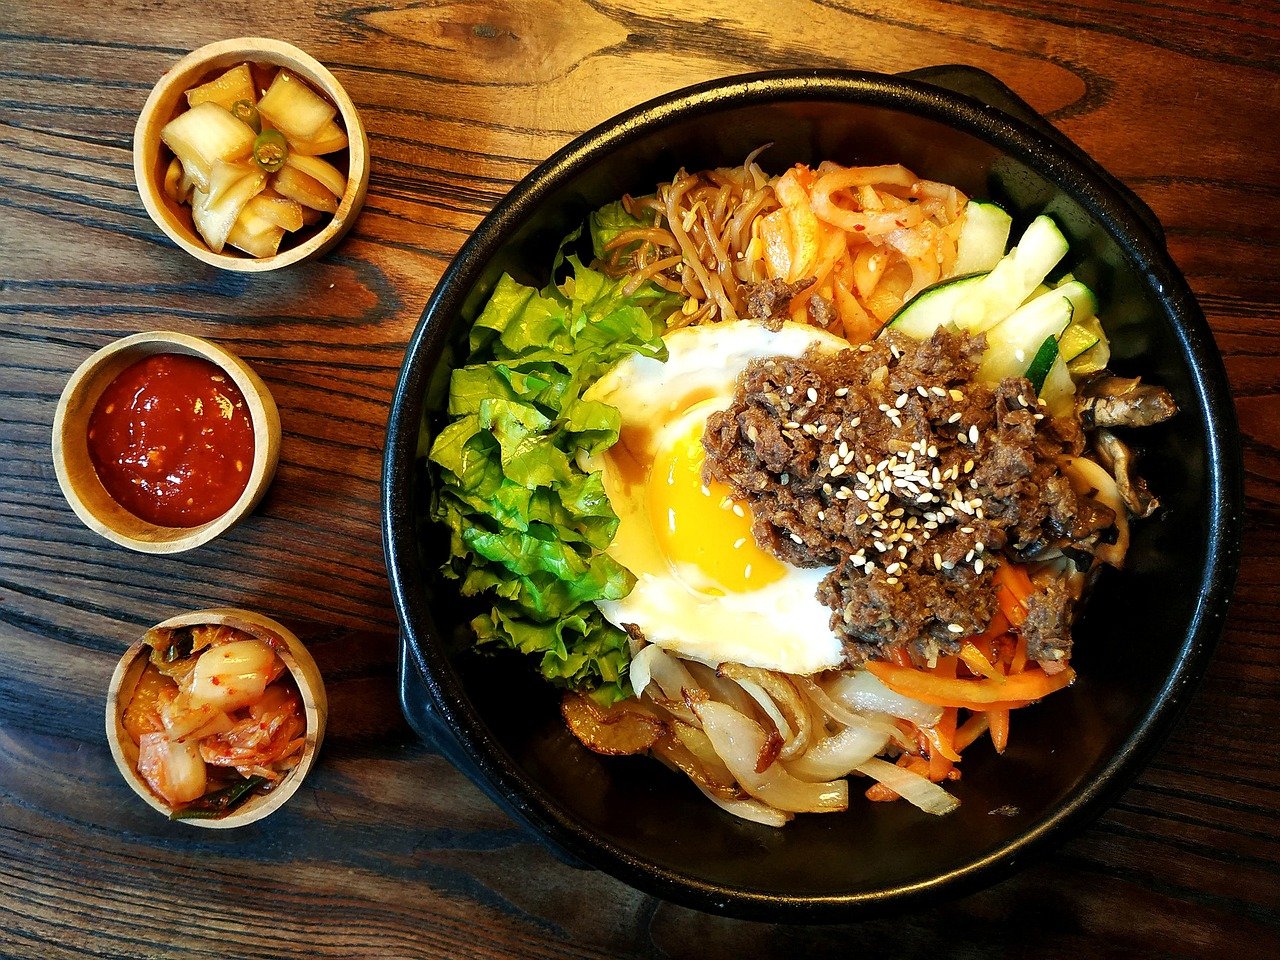
Korean bibimbap
Here's a delicious recipe for bibimbap, a colorful and flavorful Korean rice dish topped with various vegetables, meat, and a fried egg! # Ingredients # For the Rice: - **2 cups cooked white or brown rice** (preferably short-grain) - **1 tablespoon sesame oil** - **Salt, to taste** # For the Vegetables: - **1 cup spinach, blanched and squeezed dry** - **1 cup bean sprouts, blanched** - **1 carrot, julienned** - **1 zucchini, julienned** - **1 cup shiitake mushrooms, sliced** - **1 tablespoon vegetable oil** - **Salt and pepper, to taste** # For the Meat (Optional): - **8 oz (225g) beef (ribeye or sirloin), thinly sliced** (you can also use chicken or tofu) - **2 tablespoons soy sauce** - **1 tablespoon sesame oil** - **1 teaspoon sugar** - **1 garlic clove, minced** # For the Toppings: - **4 eggs** - **Gochujang (Korean chili paste)** - **Sesame seeds** - **Sliced green onions** # Instructions # 1. Prepare the Rice: - Cook rice according to package instructions. Once cooked, mix in sesame oil and a pinch of salt. Set aside. # 2. Prepare the Vegetables: 1. **Spinach:** - Blanch spinach in boiling water for 30 seconds, then cool in ice water. Squeeze out excess water and season with salt and sesame oil. 2. **Bean Sprouts:** - Blanch bean sprouts for about 2-3 minutes, then drain and season with a little salt. 3. **Carrot and Zucchini:** - Sauté the julienned carrot and zucchini in a bit of vegetable oil until tender, about 3-4 minutes. Season with salt and pepper. 4. **Mushrooms:** - Sauté shiitake mushrooms in the same pan until tender, about 4-5 minutes. Season with salt. # 3. Prepare the Meat (Optional): 1. **Marinate the Meat:** - In a bowl, mix soy sauce, sesame oil, sugar, and minced garlic. Add the sliced beef and marinate for about 15 minutes. 2. **Cook the Meat:** - In a hot skillet, stir-fry the marinated beef until cooked through, about 5-7 minutes. Set aside. # 4. Fry the Eggs: - In a separate pan, fry the eggs sunny-side up or to your preference. # 5. Assemble the Bibimbap: 1. **Rice Base:** - In a large bowl, place a serving of rice as the base. 2. **Add Toppings:** - Arrange the sautéed vegetables, cooked meat (if using), and a fried egg on top of the rice. 3. **Garnish:** - Add a dollop of gochujang, sprinkle with sesame seeds, and garnish with sliced green onions. # 6. Serve: - Mix everything together before eating for a burst of flavor! # Tips - You can customize the vegetables based on what you have or prefer. - For added crunch, top with toasted seaweed or additional sesame seeds. Enjoy your delicious bibimbap! 🍚🥕🥬🍳

Jajangmyeon
Here’s a recipe for **Jajangmyeon**, a delicious Korean noodle dish served with a savory black bean sauce! # Ingredients # For the Sauce: - **1 cup black bean paste (chunjang)** - **2 tablespoons vegetable oil** - **1 medium onion, diced** - **1 medium zucchini, diced** - **1 medium potato, diced** - **1 cup cabbage, chopped** - **2 cloves garlic, minced** - **1 tablespoon sugar** - **1 cup water or chicken broth** - **1 tablespoon soy sauce** - **1 teaspoon sesame oil** - **Salt and pepper, to taste** # For the Noodles: - **12 oz (340g) fresh or dried noodles (like wheat or udon)** - **Sliced cucumber and pickled radish for garnish** # Instructions # 1. Cook the Noodles: - Cook the noodles according to package instructions. Drain and set aside. # 2. Prepare the Sauce: 1. **Sauté Vegetables:** - In a large pan or wok, heat the vegetable oil over medium heat. Add the diced onion and garlic; sauté until fragrant and translucent. 2. **Add Vegetables:** - Add the zucchini, potato, and cabbage. Stir-fry for about 5-7 minutes until the vegetables are softened. 3. **Add Black Bean Paste:** - Push the vegetables to the side and add the black bean paste. Stir it into the vegetables for about 2-3 minutes, allowing it to cook slightly. 4. **Make the Sauce:** - Add sugar, water or broth, soy sauce, and sesame oil. Stir well and let it simmer for about 10-15 minutes until the sauce thickens. Adjust seasoning with salt and pepper. # 3. Serve: - Place the cooked noodles in bowls and ladle the black bean sauce over the top. Garnish with sliced cucumber and pickled radish. # Tips - For extra flavor, you can add diced pork or beef to the stir-fry before adding the vegetables. - Serve with a side of kimchi for a perfect meal! Enjoy your homemade Jajangmyeon! 🍜✨

Chicken Fry(Chimaek)
Here’s a delicious recipe for **Chimaek**, the popular Korean fried chicken served with beer! # Ingredients # For the Chicken: - **2 lbs chicken pieces (wings, thighs, or drumsticks)** - **1 cup buttermilk (or regular milk mixed with 1 tablespoon vinegar)** - **1 cup all-purpose flour** - **1/2 cup cornstarch** - **1 teaspoon garlic powder** - **1 teaspoon onion powder** - **1 teaspoon paprika** - **1/2 teaspoon salt** - **1/2 teaspoon black pepper** - **Oil (for frying)** # For the Sauce (Optional): - **1/4 cup gochujang (Korean chili paste)** - **2 tablespoons honey or sugar** - **1 tablespoon soy sauce** - **1 tablespoon rice vinegar** - **1 teaspoon minced garlic** - **1 teaspoon sesame oil** # Instructions # 1. Marinate the Chicken: - In a bowl, soak the chicken pieces in buttermilk for at least 1 hour (or overnight for best results). # 2. Prepare the Coating: - In a separate bowl, combine the flour, cornstarch, garlic powder, onion powder, paprika, salt, and black pepper. # 3. Coat the Chicken: - Remove chicken from the buttermilk, letting excess drip off. Dredge each piece in the flour mixture, ensuring it's well coated. Shake off any excess. # 4. Heat the Oil: - In a large, deep skillet or fryer, heat oil to 350°F (175°C). Use enough oil to fully submerge the chicken pieces. # 5. Fry the Chicken: - Carefully add the chicken to the hot oil in batches, avoiding overcrowding. Fry for about 10-12 minutes until golden brown and cooked through (internal temperature should reach 165°F or 75°C). # 6. Make the Sauce (Optional): - In a small saucepan, combine gochujang, honey, soy sauce, rice vinegar, minced garlic, and sesame oil. Heat gently until well combined. Adjust sweetness and spiciness to taste. # 7. Toss in Sauce (Optional): - If using the sauce, toss the fried chicken in the sauce while still hot until well coated. # 8. Serve: - Serve the fried chicken hot with cold beer and enjoy! # Tips - For extra crispy chicken, double fry: fry the chicken for 5-7 minutes, let it rest for 5 minutes, then fry again for another 3-5 minutes. - Serve with pickled radishes or a simple salad for balance. Enjoy your delicious Chimaek! 🍗🍺

Tempura
Here’s a simple and delicious recipe for **tempura**, a classic Japanese dish featuring lightly battered and fried vegetables and seafood. # Ingredients # For the Tempura Batter: - **1 cup all-purpose flour (plus extra for dusting)** - **1/2 cup cold water (or ice water)** - **1 large egg** - **1 teaspoon baking powder (optional)** - **Pinch of salt** # For the Tempura: - **Vegetables (e.g., sweet potatoes, zucchini, bell peppers, mushrooms, green beans)** - **Seafood (e.g., shrimp, white fish)** - **Oil for frying (vegetable or canola)** #### For Dipping Sauce (Tentsuyu): - **1/2 cup dashi broth (or water)** - **2 tablespoons soy sauce** - **1 tablespoon mirin (optional)** - **Grated daikon radish (for serving)** # Instructions # 1. Prepare the Ingredients: - Slice the vegetables into bite-sized pieces. For shrimp, peel and devein, leaving the tails on if desired. - Pat everything dry with paper towels to ensure the batter sticks. # 2. Make the Tempura Batter: 1. **Mix Batter:** - In a bowl, lightly beat the egg, then add cold water. Gradually whisk in the flour and baking powder until just combined. The batter should be lumpy—do not overmix. # 3. Heat the Oil: - In a deep skillet or pot, heat oil to 350°F (175°C). You can test the oil by dropping in a small amount of batter; it should sizzle and rise to the surface. # 4. Fry the Tempura: 1. **Dust Ingredients:** - Lightly dust the vegetables and seafood with flour to help the batter adhere. 2. **Dip and Fry:** - Dip the ingredients into the batter and gently place them in the hot oil. Fry in small batches, avoiding overcrowding. 3. **Cook Until Golden:** - Fry for about 2-3 minutes until golden and crispy. Use a slotted spoon to remove them and drain on paper towels. # 5. Make the Dipping Sauce: - In a small saucepan, combine dashi broth, soy sauce, and mirin. Heat gently and serve with grated daikon on the side. # 6. Serve: - Serve the tempura hot with the dipping sauce on the side. # Tips - For extra crispiness, keep the batter cold and use ice water. - Experiment with different vegetables and seafood according to your preference. - Enjoy with steamed rice or a light salad for a complete meal! Enjoy your delicious homemade tempura! 🍤🥕✨
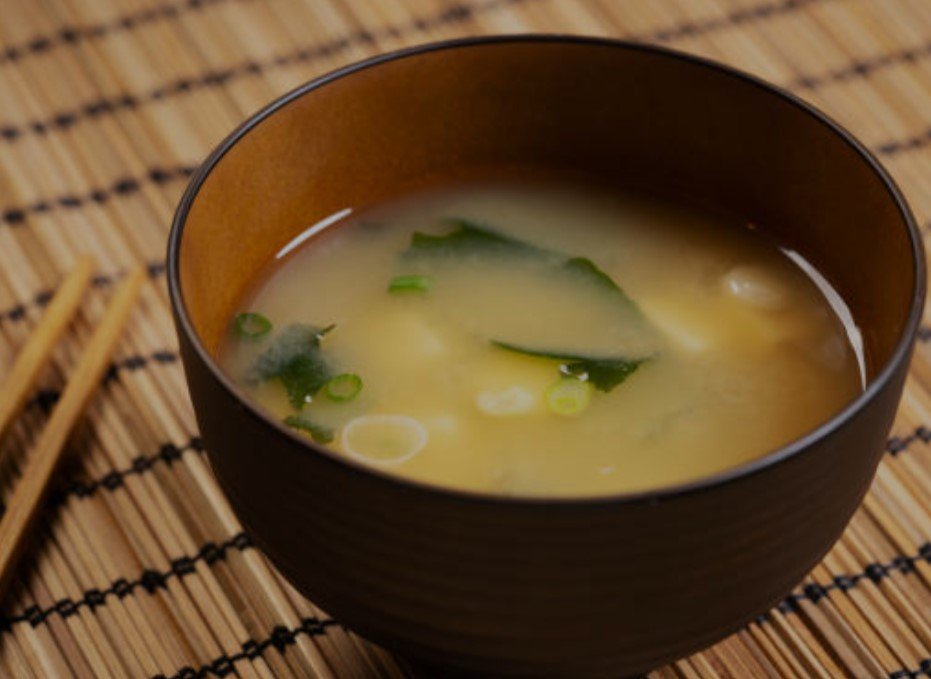
Miso soup
Here’s a simple and comforting recipe for **miso soup**, a classic Japanese dish that's easy to make! # Ingredients - **4 cups dashi broth (or water)** - **3-4 tablespoons miso paste (white or red)** - **1 cup tofu, cubed (soft or firm, as preferred)** - **1 cup seaweed (wakame, rehydrated if dried)** - **2 green onions, sliced** - **Optional: mushrooms (shiitake or enoki), sliced carrots, or other vegetables** # Instructions # 1. Prepare the Dashi: - If using instant dashi, follow the package instructions. If making from scratch, simmer kombu (dried kelp) in water for 30 minutes, then remove the kombu and add bonito flakes. Strain the broth. # 2. Heat the Broth: - In a pot, bring the dashi or water to a gentle simmer over medium heat. # 3. Add Vegetables: - If using additional vegetables, add them to the pot and cook until tender. # 4. Dissolve the Miso: 1. **Take a small amount of the hot broth** and mix it with the miso paste in a small bowl to create a smooth mixture. 2. **Return the miso mixture** to the pot. Avoid boiling the soup after adding miso to preserve its flavor and beneficial probiotics. # 5. Add Tofu and Seaweed: - Gently add the cubed tofu and rehydrated seaweed to the pot. Heat through for a few minutes. # 6. Serve: - Ladle the soup into bowls and garnish with sliced green onions. # Tips - Adjust the amount of miso paste according to your taste preference. - Miso soup is highly customizable; feel free to add ingredients like clams, bok choy, or other seasonal vegetables. Enjoy your comforting bowl of miso soup! 🍲✨
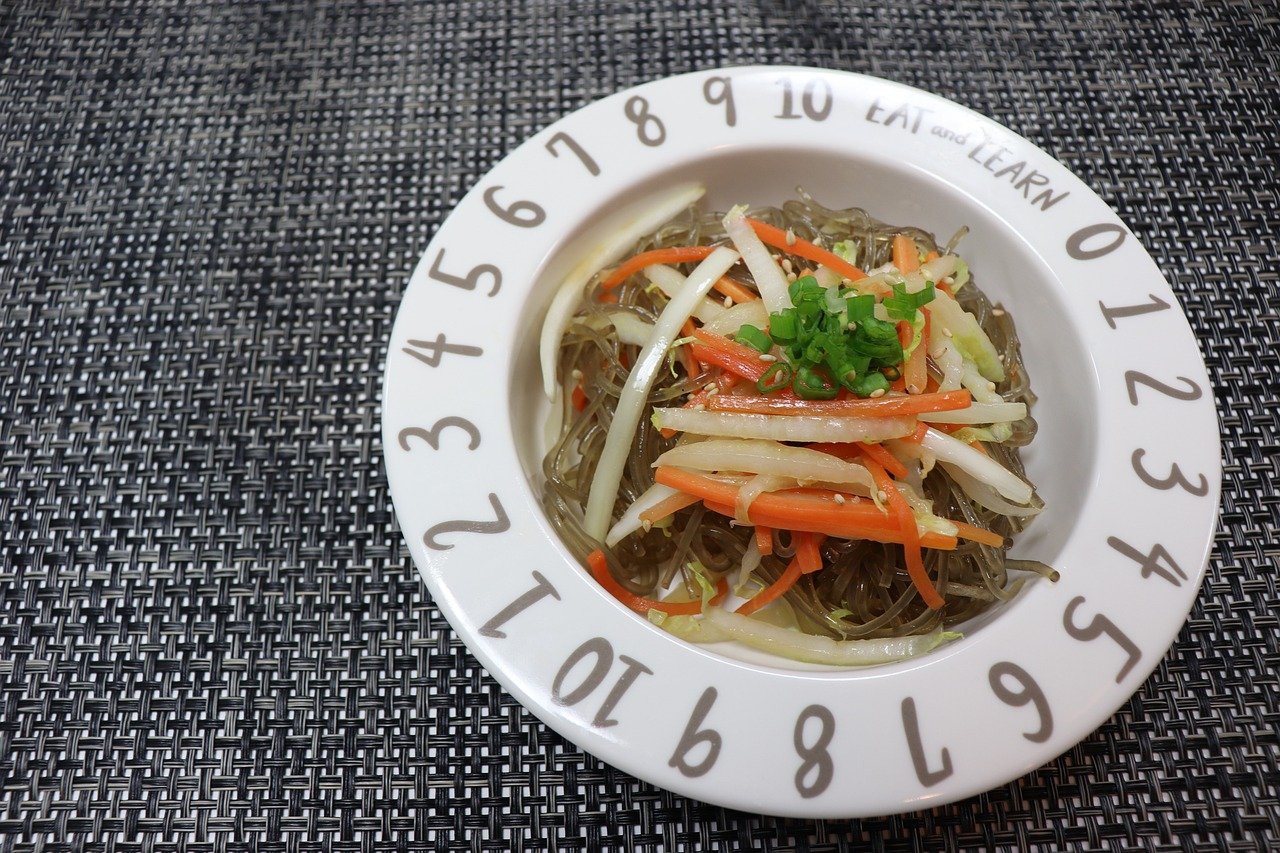
Japchae(Korean Glass Noodles)
Here’s a delicious recipe for **Japchae**, a popular Korean dish made with glass noodles, vegetables, and sometimes beef or other proteins! # Ingredients - **8 oz (225g) sweet potato glass noodles (dangmyeon)** - **1 tablespoon sesame oil** - **2 tablespoons vegetable oil** - **1 medium onion, thinly sliced** - **1 carrot, julienned** - **1 bell pepper (red or green), thinly sliced** - **1 cup spinach, blanched** - **4-5 shiitake mushrooms, sliced (or any mushrooms)** - **2-3 green onions, chopped** - **2 cloves garlic, minced** - **1/2 lb (225g) beef (or tofu), thinly sliced (optional)** # For the Sauce: - **3 tablespoons soy sauce** - **1 tablespoon sugar** - **1 tablespoon sesame oil** - **1 teaspoon ground black pepper** - **Sesame seeds (for garnish)** # Instructions # 1. Prepare the Glass Noodles: - Cook the sweet potato glass noodles according to package instructions. Drain and rinse under cold water. Cut them into shorter lengths if desired, then toss with 1 tablespoon of sesame oil. # 2. Prepare the Sauce: - In a small bowl, mix together the soy sauce, sugar, sesame oil, and black pepper. Set aside. # 3. Stir-Fry the Vegetables: 1. **Heat Oil:** - In a large skillet or wok, heat 2 tablespoons of vegetable oil over medium-high heat. 2. **Add Onions and Garlic:** - Sauté the onion and minced garlic until fragrant and translucent. 3. **Add Remaining Vegetables:** - Add the carrot, bell pepper, and mushrooms. Stir-fry until the vegetables are tender. 4. **Add Spinach:** - Add the blanched spinach and stir to combine. # 4. Cook the Beef (if using): - If you're using beef, push the vegetables to the side and add the beef to the pan. Cook until browned and cooked through, then mix everything together. # 5. Combine Noodles and Sauce: - Add the cooked glass noodles to the pan. Pour the prepared sauce over the noodles and toss everything together until well combined. Cook for another 2-3 minutes to heat through. # 6. Serve: - Transfer to a serving dish and garnish with chopped green onions and sesame seeds. # Tips - Feel free to customize with your favorite vegetables or proteins! - Japchae is delicious served hot or at room temperature. Enjoy your homemade Japchae! 🍜✨.
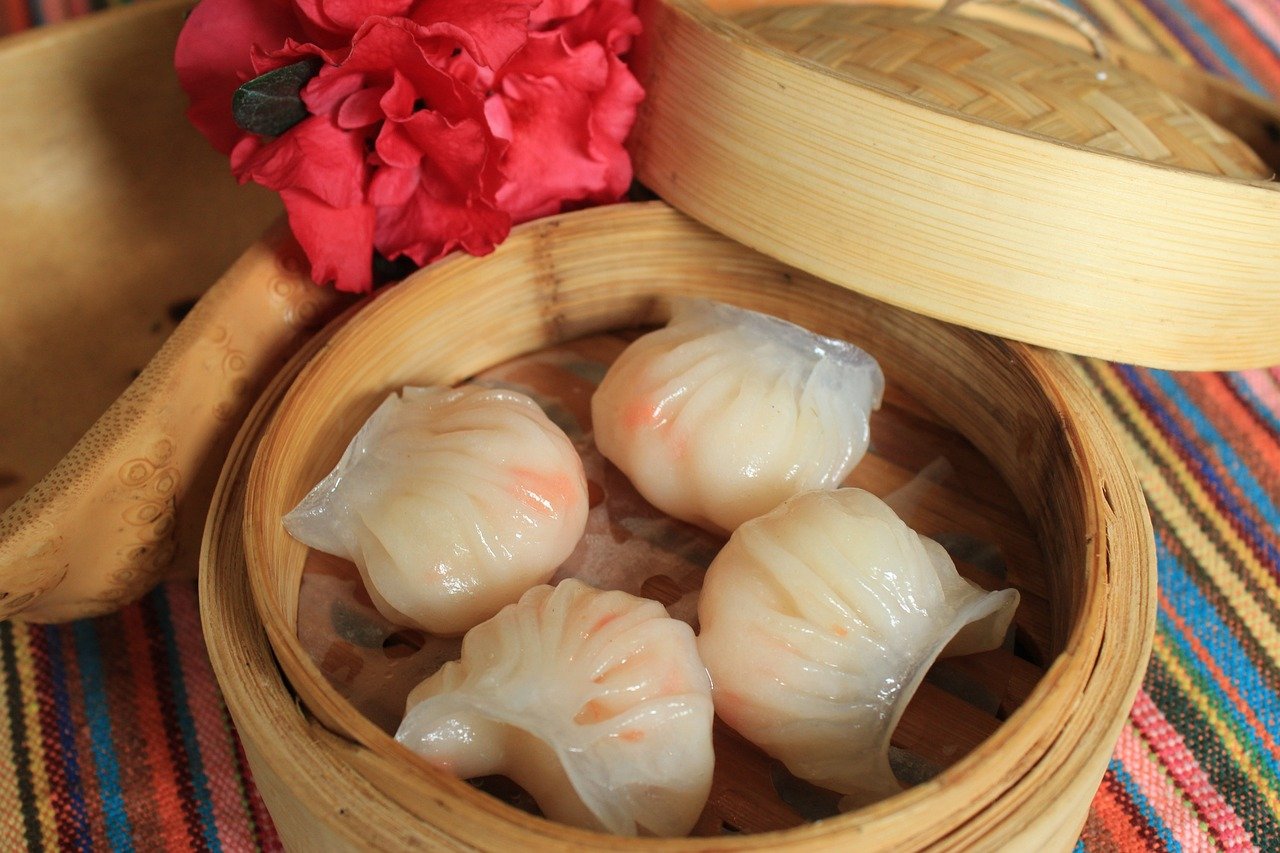
Dumplings(Dim Sum)
Here’s a tasty recipe for **dim sum dumplings**, specifically **Shrimp and Pork Dumplings** (Har Gow and Siu Mai style). These dumplings are perfect for steaming and are a delightful treat! # Ingredients # For the Dumpling Wrappers: - **1 ½ cups all-purpose flour** - **1/2 cup boiling water** - **1/4 teaspoon salt** # For the Filling: - **8 oz (225g) shrimp, peeled and deveined, chopped** - **4 oz (115g) ground pork (or chicken)** - **2 tablespoons soy sauce** - **1 tablespoon sesame oil** - **1 tablespoon cornstarch** - **2 green onions, finely chopped** - **1 teaspoon grated ginger** - **1 teaspoon minced garlic** - **Salt and pepper, to taste** # Instructions # 1. Make the Dumpling Wrappers: 1. **Mix Flour and Salt:** - In a bowl, combine the flour and salt. 2. **Add Boiling Water:** - Gradually pour in boiling water, stirring with a fork or chopsticks until a dough forms. 3. **Knead:** - Once cool enough to handle, knead the dough on a floured surface for about 5 minutes until smooth. Cover with a damp cloth and let it rest for 30 minutes. # 2. Prepare the Filling: - In a bowl, mix the chopped shrimp, ground pork, soy sauce, sesame oil, cornstarch, green onions, ginger, garlic, salt, and pepper until well combined. # 3. Form the Dumplings: 1. **Roll the Dough:** - Divide the dough into small pieces (about 1 inch in size). Roll each piece into a ball, then flatten it with a rolling pin into a thin circle (about 3 inches in diameter). 2. **Fill the Dumplings:** - Place about 1 tablespoon of filling in the center of each wrapper. For Har Gow, pleat the edges to seal; for Siu Mai, leave the top open and pinch the sides. # 4. Steam the Dumplings: 1. **Prepare the Steamer:** - Line a bamboo steamer with parchment paper or cabbage leaves to prevent sticking. Place the dumplings in the steamer, leaving space between them. 2. **Steam:** - Bring water to a boil in a pot. Place the steamer over the pot and steam for about 6-8 minutes, or until the dumplings are cooked through. # 5. Serve: - Serve hot with soy sauce or your favorite dipping sauce! # Tips - Feel free to experiment with different fillings like vegetables or other proteins. - Make extra dumplings and freeze them before cooking for later enjoyment. Enjoy your homemade dim sum dumplings! 🥟✨
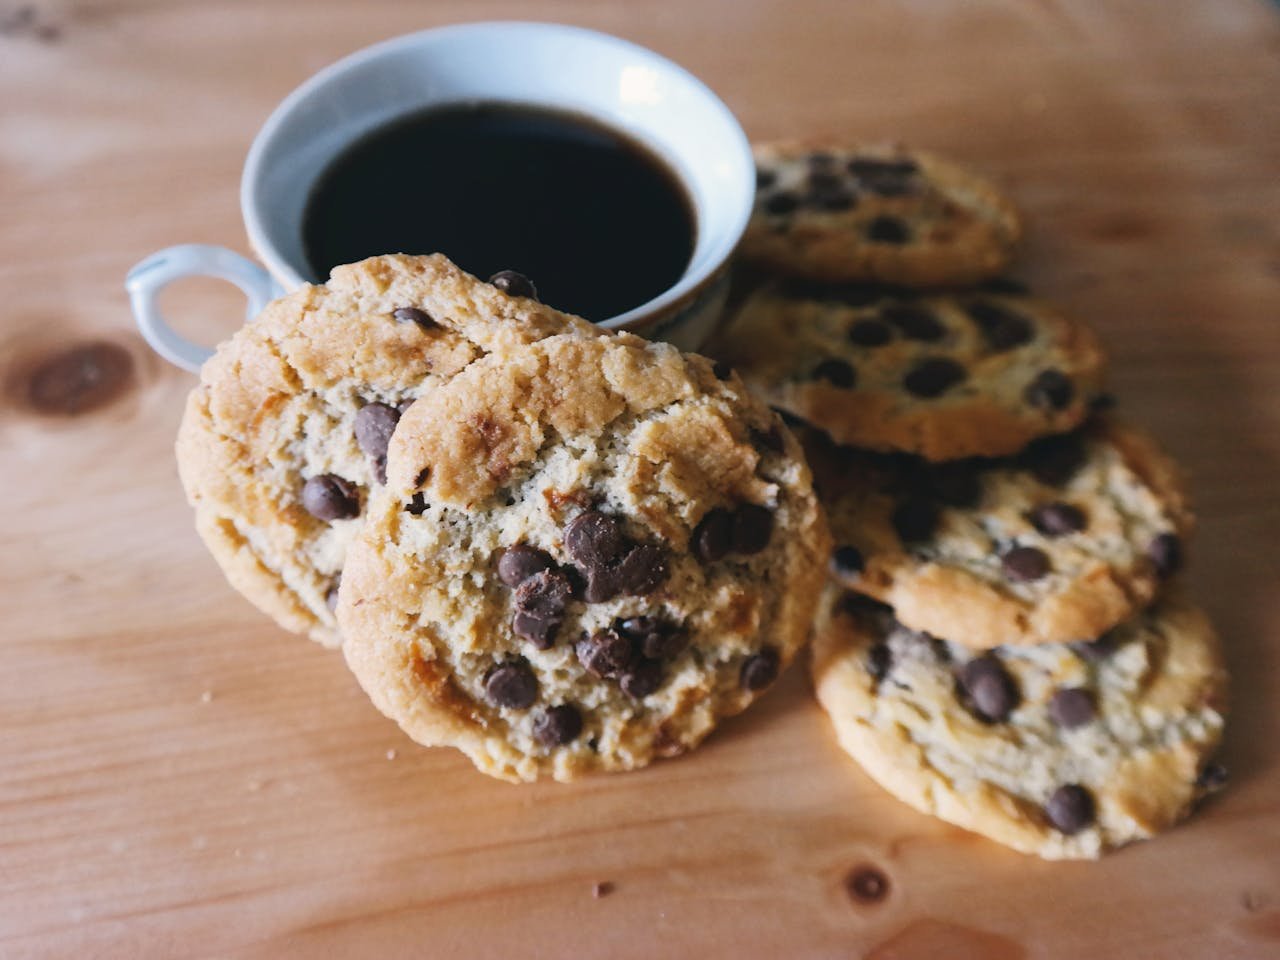
Chocolate Cookies
Here’s a classic recipe for **chocolate chip cookies** that are chewy, soft, and delicious! # Ingredients - **1 cup (2 sticks) unsalted butter, softened** - **3/4 cup granulated sugar** - **3/4 cup packed brown sugar** - **1 teaspoon vanilla extract** - **2 large eggs** - **2 1/4 cups all-purpose flour** - **1 teaspoon baking soda** - **1/2 teaspoon salt** - **2 cups semi-sweet chocolate chips** - **1 cup chopped nuts (optional)** # Instructions # 1. Preheat the Oven: - Preheat your oven to 350°F (175°C). Line baking sheets with parchment paper. # 2. Cream the Butter and Sugars: - In a large bowl, beat together the softened butter, granulated sugar, brown sugar, and vanilla extract until creamy. # 3. Add Eggs: - Add the eggs one at a time, mixing well after each addition. # 4. Mix Dry Ingredients: - In another bowl, whisk together the flour, baking soda, and salt. # 5. Combine: - Gradually add the dry ingredients to the wet ingredients, mixing until just combined. Be careful not to overmix. # 6. Stir in Chocolate Chips and Nuts: - Fold in the chocolate chips and nuts (if using). # 7. Scoop and Bake: - Drop rounded tablespoons of dough onto the prepared baking sheets, leaving space between each cookie. # 8. Bake: - Bake for 9-11 minutes, or until the edges are golden brown. The centers may look slightly underbaked; they will firm up as they cool. # 9. Cool: - Let the cookies cool on the baking sheet for a few minutes before transferring them to a wire rack to cool completely. # Tips - For extra flavor, chill the dough for 30 minutes before baking. - Store cookies in an airtight container to keep them fresh. Enjoy your delicious chocolate chip cookies! 🍪✨

Sushi
Here’s a simple recipe for making **sushi rolls** (maki) at home! # Ingredients # For the Sushi Rice: - **2 cups sushi rice** - **2 1/2 cups water** - **1/4 cup rice vinegar** - **2 tablespoons sugar** - **1 teaspoon salt** # For the Sushi Rolls: - **Nori sheets (seaweed)** - **Your choice of fillings (e.g., raw fish, cooked shrimp, cucumber, avocado, carrots, or pickled radish)** - **Soy sauce (for dipping)** - **Wasabi and pickled ginger (optional)** # Instructions # 1. Prepare the Sushi Rice: 1. **Rinse the Rice:** - Rinse the sushi rice under cold water until the water runs clear to remove excess starch. 2. **Cook the Rice:** - In a rice cooker or pot, combine the rinsed rice and water. Cook according to the rice cooker instructions or bring to a boil, then reduce heat to low, cover, and simmer for about 20 minutes. Remove from heat and let it sit for 10 minutes. 3. **Season the Rice:** - In a small saucepan, combine rice vinegar, sugar, and salt over low heat until dissolved. Gently mix this seasoning into the cooked rice while it’s still warm. Let it cool to room temperature. # 2. Prepare the Fillings: - Slice your chosen fillings into thin strips. Prepare any vegetables and ensure seafood is fresh and ready. # 3. Roll the Sushi: 1. **Lay Out the Nori:** - Place a sheet of nori, shiny side down, on a bamboo sushi mat (or a clean surface). 2. **Add Rice:** - Wet your hands to prevent sticking, then take about a cup of sushi rice and spread it evenly over the nori, leaving about 1 inch at the top edge. 3. **Add Fillings:** - Place your chosen fillings in a line across the center of the rice. 4. **Roll the Sushi:** - Starting from the edge closest to you, lift the bamboo mat and roll it away from you, tucking the filling inside. Roll tightly but not too tight to avoid squishing. Use the mat to shape the roll. 5. **Seal the Roll:** - Wet the top edge of the nori with a little water to seal the roll. # 4. Slice and Serve: - Use a sharp, wet knife to slice the roll into bite-sized pieces. Serve with soy sauce, wasabi, and pickled ginger. # Tips - Feel free to experiment with different fillings and sauces. - To make it vegetarian, use ingredients like avocado, cucumber, and carrots. - For a fun variation, try making sushi burritos by using larger nori sheets and more fillings. Enjoy your homemade sushi! 🍣✨.

Salad
.Here’s a fresh and vibrant **mixed salad** recipe that's easy to customize! # Ingredients # Base: - **4 cups mixed greens (e.g., spinach, arugula, romaine)** - **1 cup cherry tomatoes, halved** - **1 cucumber, diced** - **1 bell pepper, diced (any color)** - **1/4 red onion, thinly sliced** - **1 carrot, grated or julienned** # Optional Add-Ins: - **1/2 cup avocado, diced** - **1/2 cup feta cheese, crumbled** - **1/2 cup chickpeas (canned, rinsed)** - **1/4 cup nuts or seeds (e.g., almonds, walnuts, sunflower seeds)** # Dressing: - **3 tablespoons olive oil** - **1 tablespoon balsamic vinegar (or lemon juice)** - **1 teaspoon Dijon mustard (optional)** - **Salt and pepper, to taste** # Instructions # 1. Prepare the Vegetables: - Wash and dry the mixed greens and other vegetables. Chop, slice, or dice as needed. # 2. Make the Dressing: - In a small bowl or jar, whisk together olive oil, balsamic vinegar (or lemon juice), Dijon mustard, salt, and pepper until well combined. # 3. Assemble the Salad: 1. In a large bowl, combine the mixed greens, cherry tomatoes, cucumber, bell pepper, red onion, and carrot. 2. Add any optional ingredients you like (avocado, feta, chickpeas, nuts, etc.). # 4. Dress the Salad: - Drizzle the dressing over the salad and toss gently to combine. # 5. Serve: - Serve immediately, or chill for a bit if you prefer it cold. # Tips - Feel free to customize with your favorite veggies, proteins (like grilled chicken or tofu), or grains (like quinoa or farro). - For added flavor, you can add fresh herbs like parsley or basil. Enjoy your delicious and healthy salad! 🥗✨
